

The touchscreen is surrounded by quite a large bezel which forms part of the protective case. With a lot of metal parts, it’s a pretty hefty unit that feels really solid – and heavy, at 1.67kg. Six mount points (two top and bottom, one either side) enable it to be mounted using the supplied brackets and bolts.
By default, the case has an IP (ingress protection) rating of 20, for protection against solid objects up to 12mm, but you can pay a little extra (€25) for IP65, which offers full protection against dust and low-pressure jets of water from all directions. Both versions have a wide operating temperature range of 0°C to 50°C, with humidity of 0% to 90%. The unit also has a shock resistance of 80m/s2 in the X, Y, and Z directions.

Powering it `up
After connecting a 12V (2.5A) or 24V (1.25A) DC power supply to the relevant screw terminals on the right-hand side (make sure the polarity is correct!), the TouchBerry comes to life, booting into Raspberry Pi OS – there’s no physical power button.
The pre-installed edition of Raspberry Pi OS is the older Buster version, although you could always re-flash or replace the microSD card by opening up the back of the case, a procedure which also enables you to move some jumper switches to reconfigure settings such as voltage levels for the I/O. The system runs fine, although we did experience occasional lag when trying to select items on the desktop.
You can connect to a Wi-Fi network from the desktop or command line (although we needed to manually add a network gateway to gain internet access), or plug in an Ethernet cable for a wired connection. The latter can also be used to network the TouchBerry Pi with a dedicated PLC to add extra I/O and exchange data. Naturally, you can install extra Raspberry Pi software in the usual way.
The only visual clue to the presence of Raspberry Pi 4 is provided by a cutouts for the latter’s USB and Ethernet ports, at the base of the unit. So you can plug in a mouse and keyboard if you want. Alternatively, you can install an on-screen keyboard.
Ins and outs
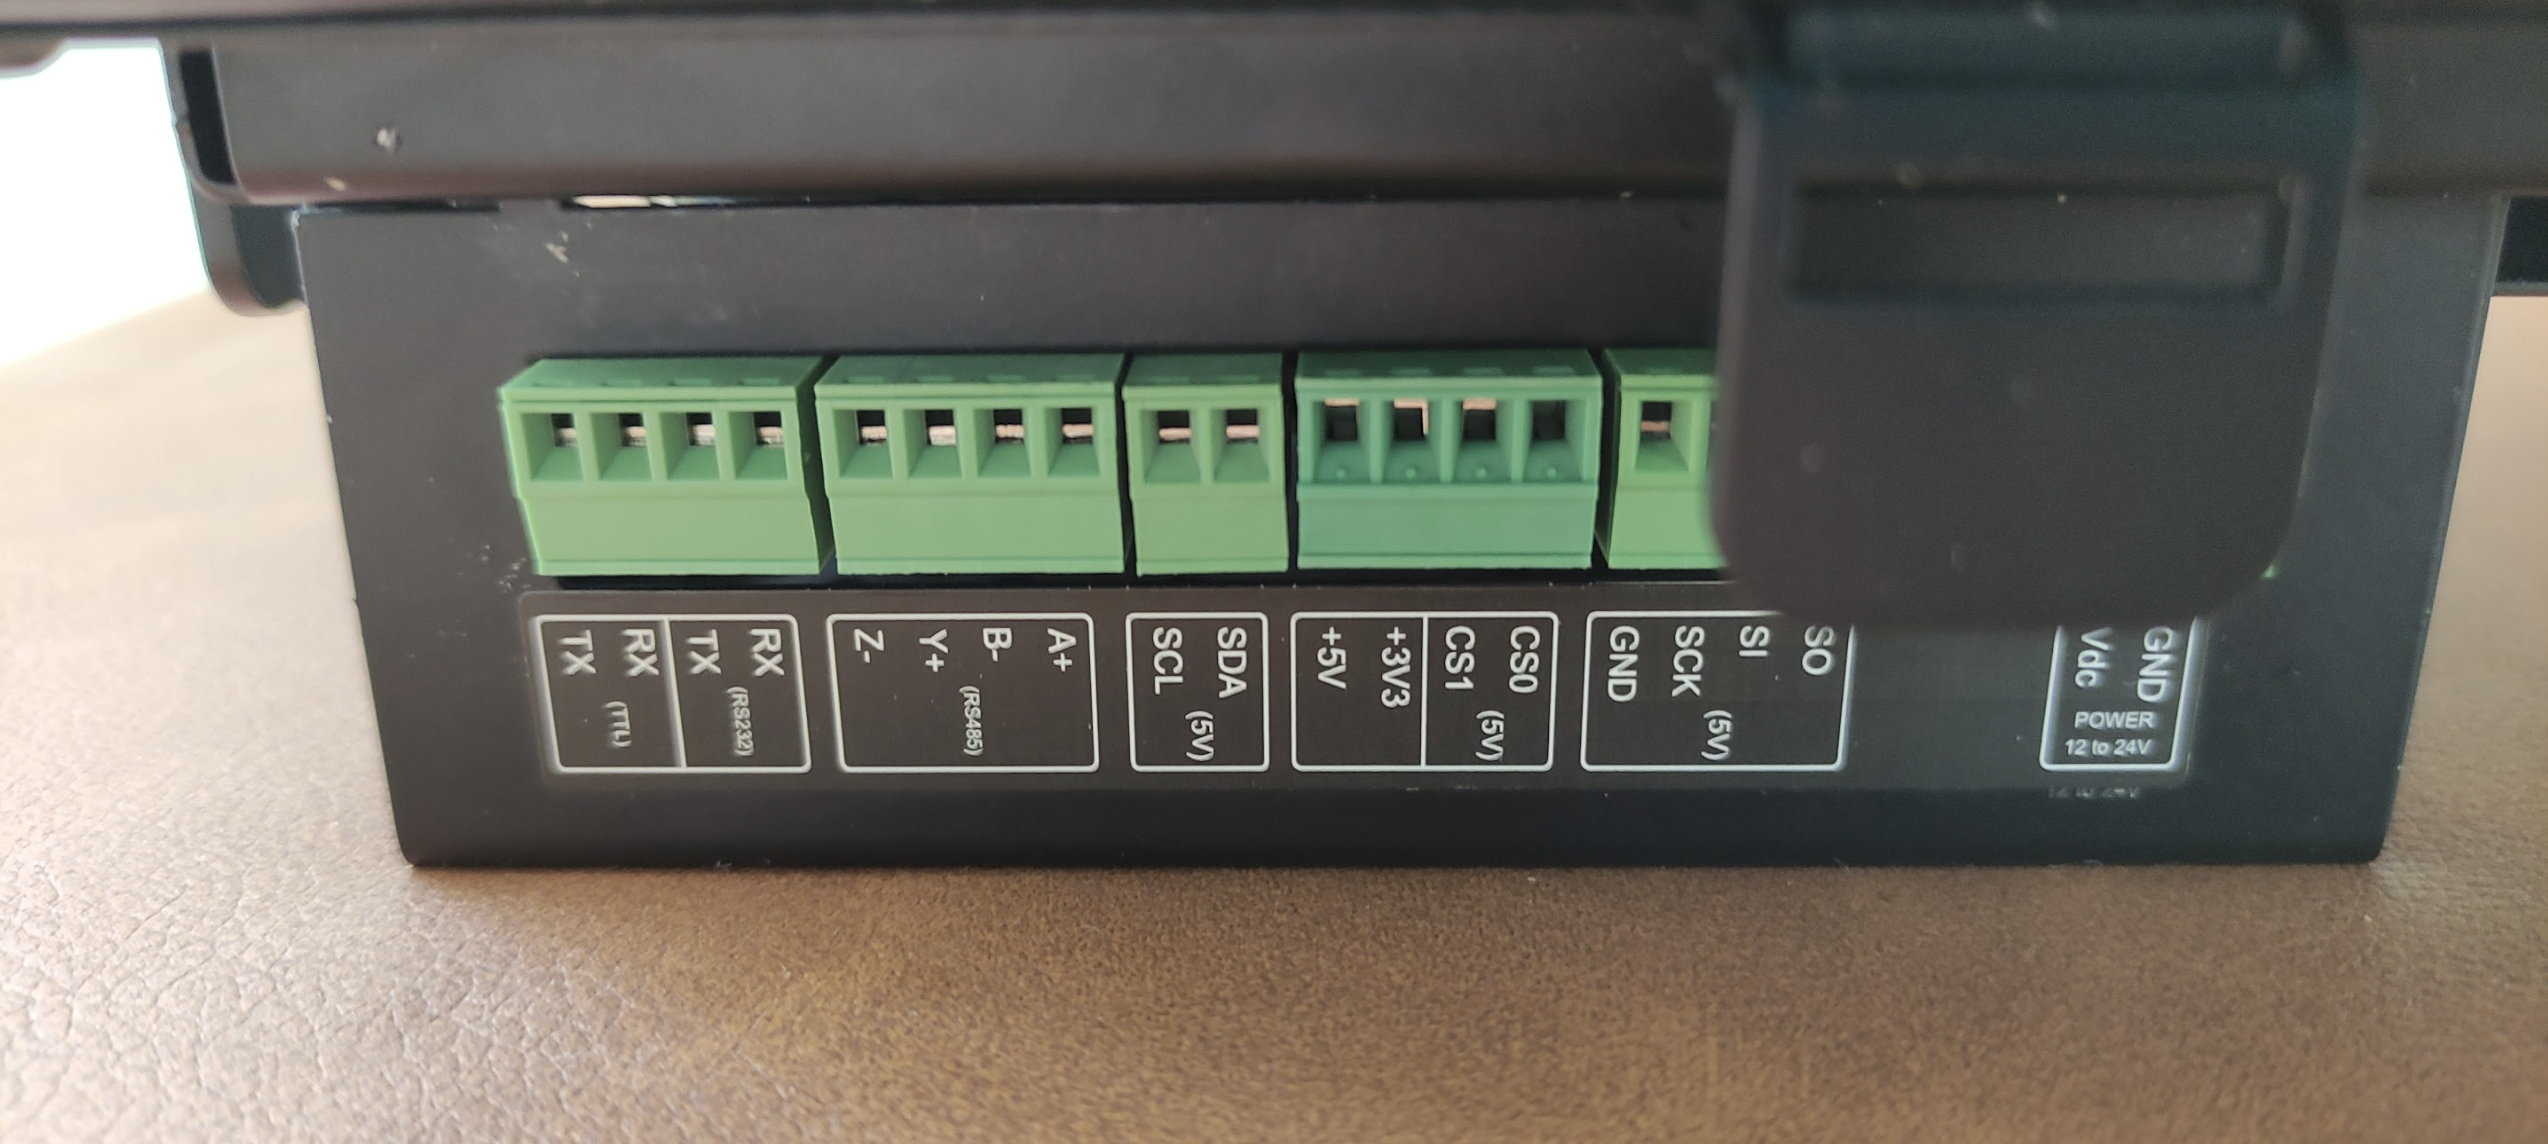
As mentioned, there are two sets of screw terminal connections on either side of the device for I/O. The right-hand side covers all of the main communications protocols: I2C, SPI, RS485 (half or full duplex), and RS232/TTL.
On the left side is the second set of I/Os, which requires an additional power supply to be connected to the 24V COM terminals there. Both the digital and analogue I/Os have self-insulation, so can be connected to power supplies with different voltages than 24V. Two analogue inputs can be used in the default 4–20mA configuration (requiring a 1kΩ resistor) or 0–10V. Three digital inputs and five digital outputs complete the set.
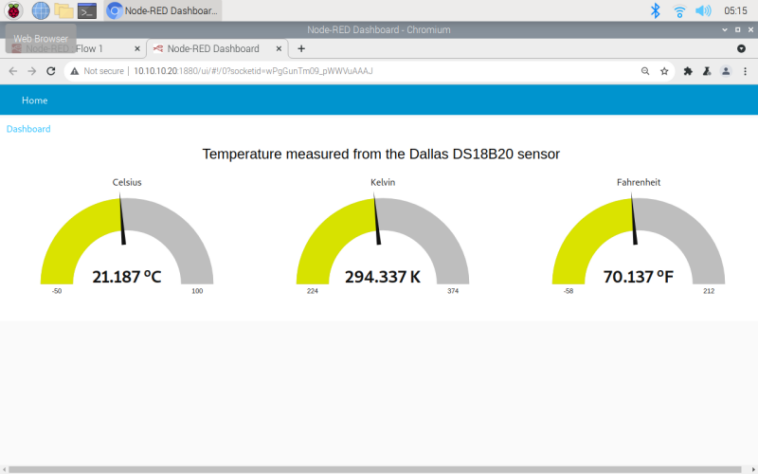
While the total number of I/Os on the TouchBerry Pi is no match for the huge number featured on a dedicated PLC, there should be enough here for many basic applications. We tested it out by connecting a DS18B20 temperature sensor and displaying the data in on-screen gauges using the Node-RED low-code environment, as detailed here. A little configuration is required, but it’s fairly easy to set up and deploy.
Verdict
8/10
A really solid unit with good hazard protection, a decent touchscreen, and enough I/O for simple applications.
Specs
Display: Capacitive touch, 10.1-inch, 1280×800, TFT/IPS, 900 nits, RTD2662 controller chip
Connections: Screw terminals for power, I2C, SPI, RS485, RS232/TTL, 2 × analogue inputs, 3 × digital inputs, 5 × digital outputs

