


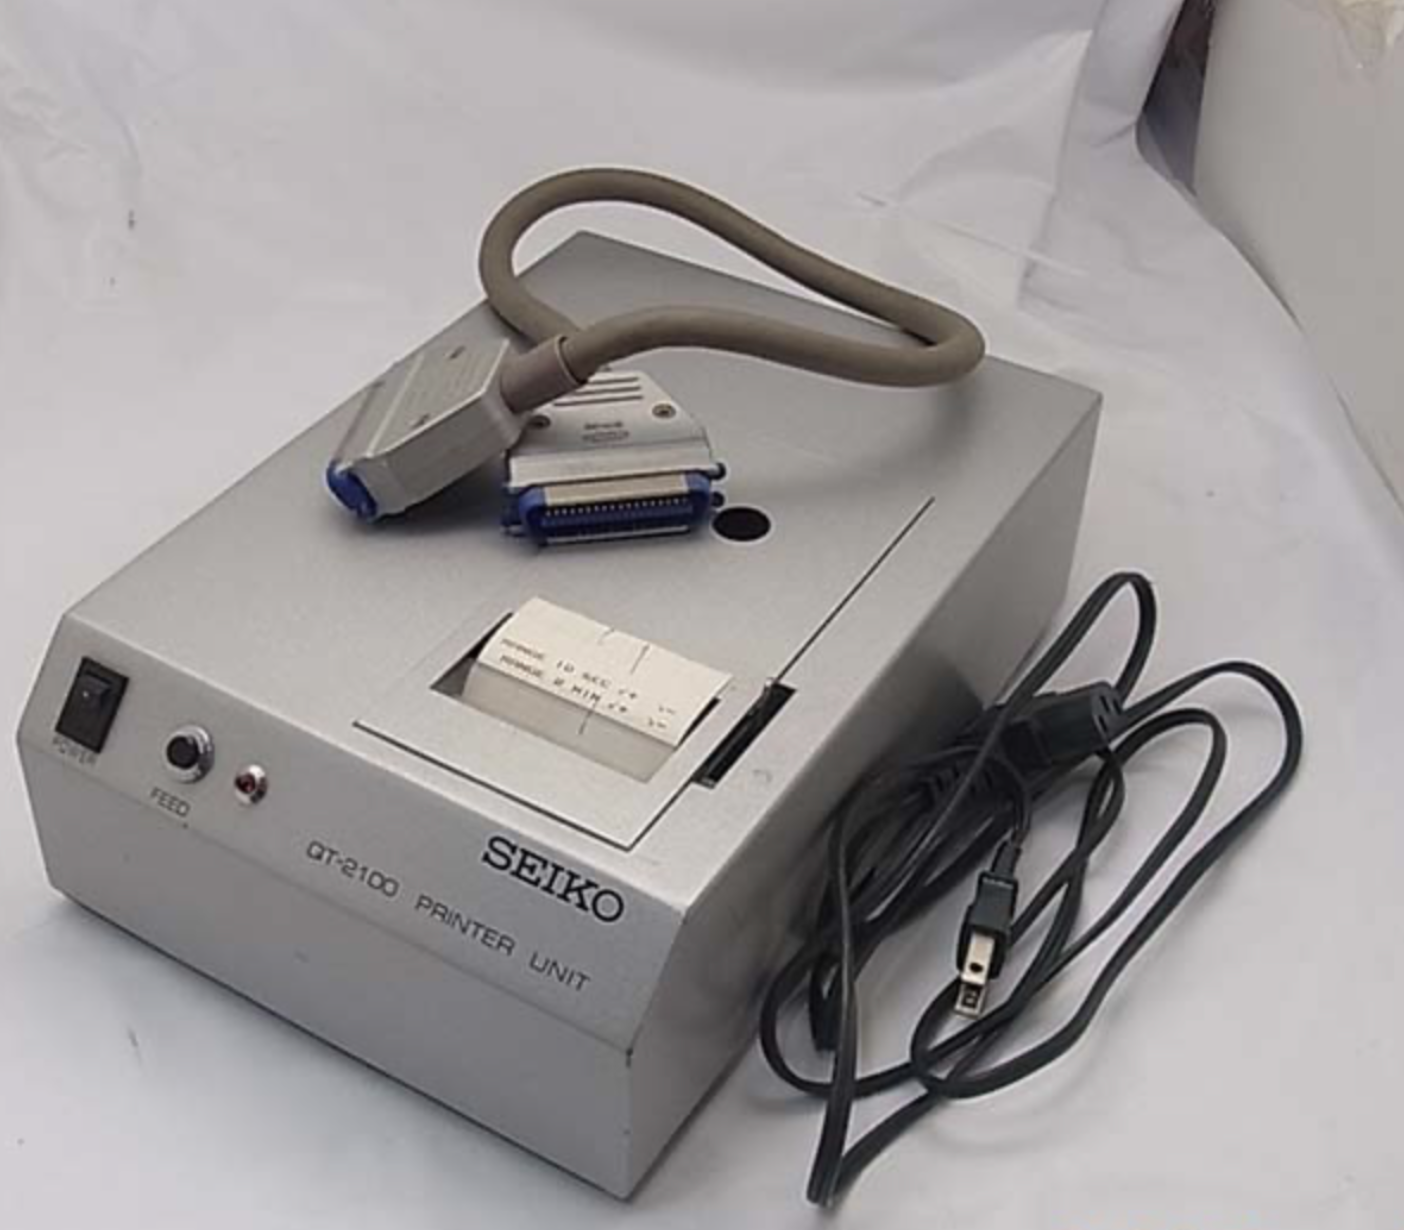
“I was working at Heathrow Airport developing controls software for a baggage handling line in 1999 when we decided it would be useful to attach a dot matrix printer to keep track of errors and how the code was treating each piece of luggage passing through the system,” he explains.
“The choices for a dot matrix printer with a Centronics connector were very limited and still cost more than £500. From using a Sinclair QL at home I also knew the problems of finding a suitable printer which understood plain text and realised this was going to pose an increasing issue for home-computer users and industry.”
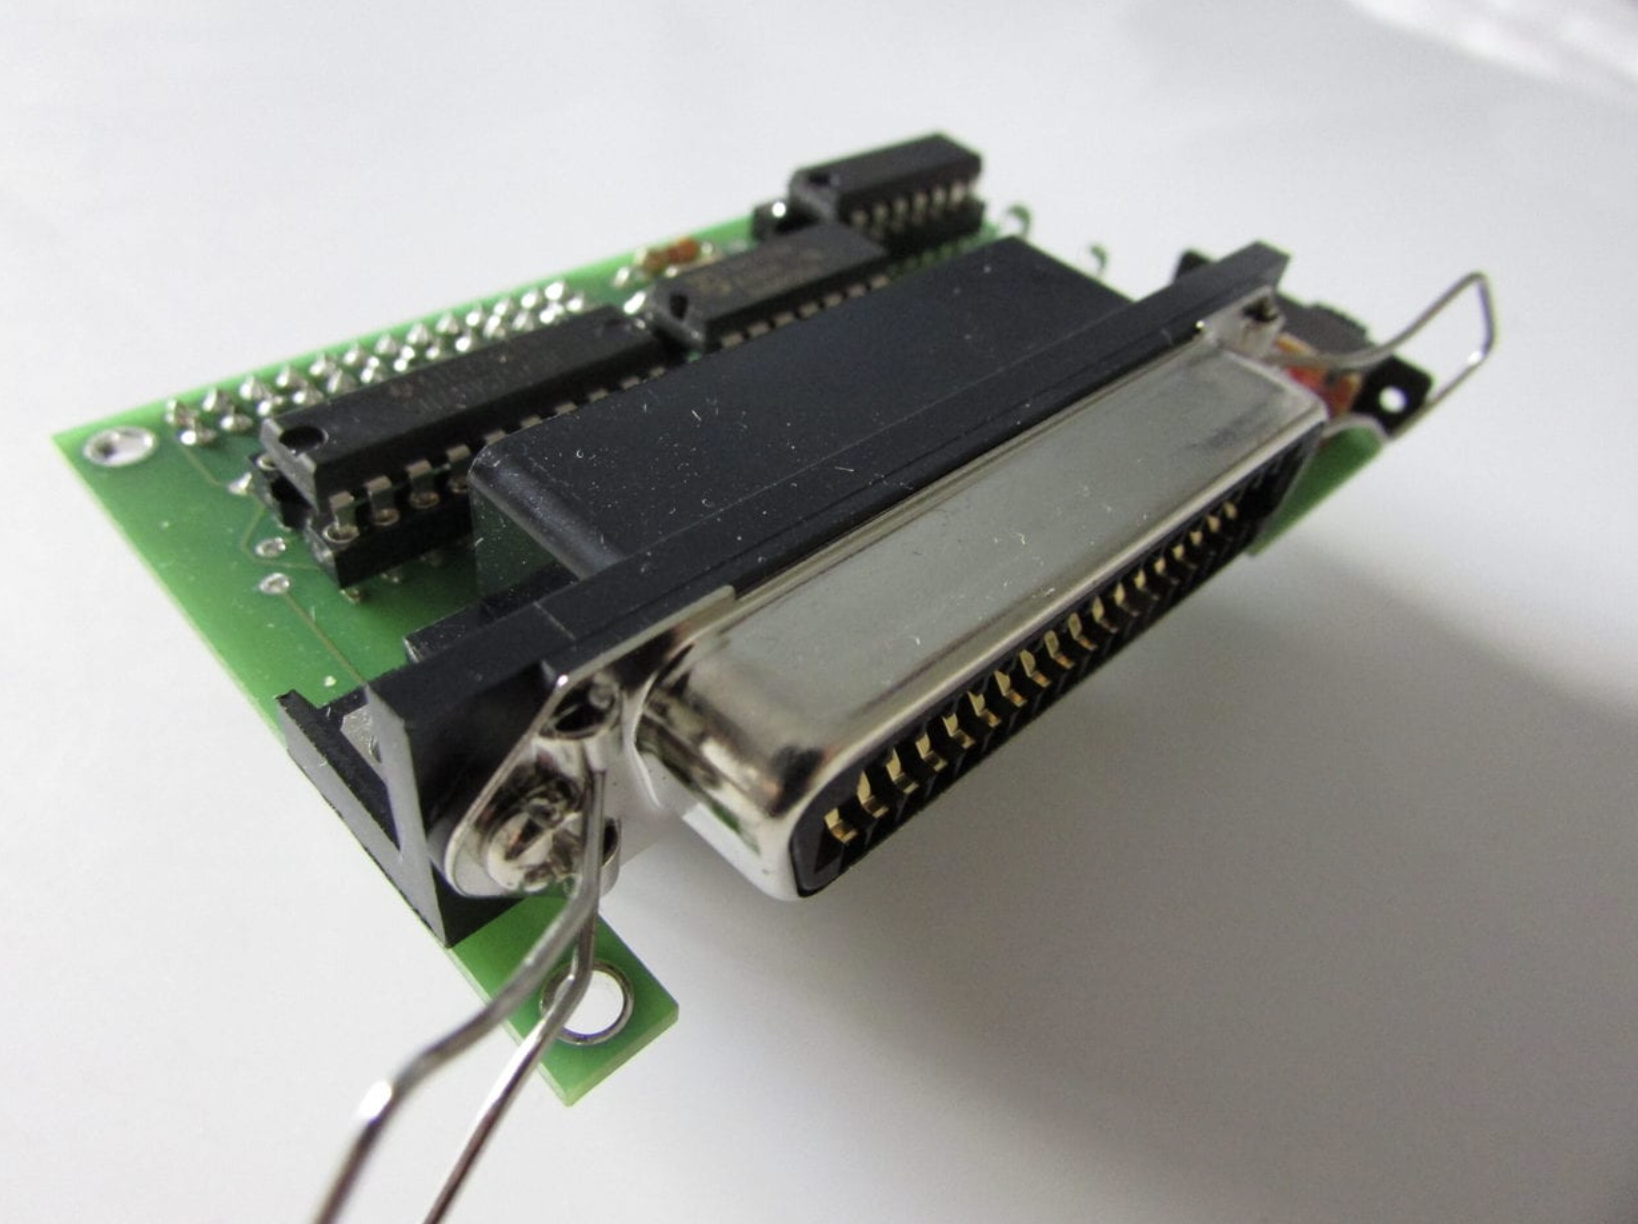
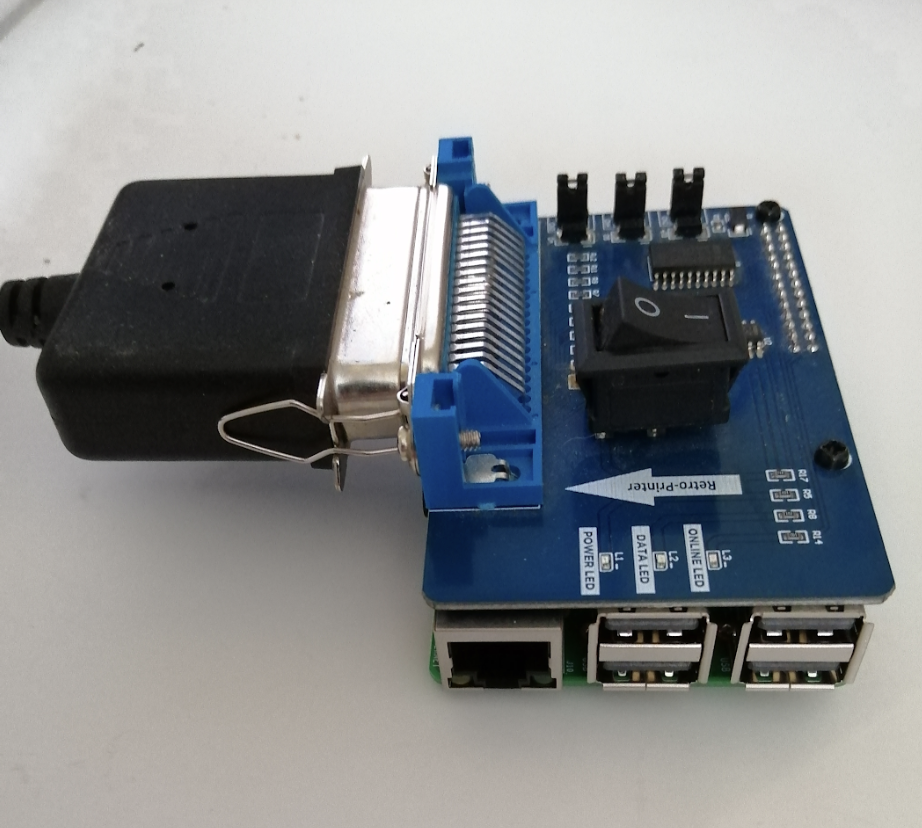
Having talked with two fellow electrical engineers, he tried in vain to work out a low-cost solution. “It was only with the release of the earliest Raspberry Pi that I realised an affordable printer emulator could be developed,” he says. This prompted him to begin work on the Retro-Printer project – a HAT designed to plug into a Raspberry Pi computer that allows data captured from the Centronics (or parallel) port on a retro machine to be sent to a modern printer.
Bit by bit
Most personal computers released from the 1970s to the 2000s had Centronics ports for connecting the machines to printers and other devices. Data would be sent eight bits at a time in parallel to each other at 150 kilobytes/sec. Rich figured he could develop working hardware that acted as an interface between the port of any one of those computers and the Raspberry Pi. Software would then convert the captured data into a PDF, ready for printing.
“The Retro-Printer HAT is simply an interface to convert the incoming data signals from the Centronics output to the GPIO pins on a Raspberry Pi computer,” Rich says. “The hardware incorporates some hard-wired signals so that the busy signal is asserted as soon as any data is received from the Centronics port, and we found that we needed to add jumpers to allow 5v to be enabled on three different pins of the Centronics port as this was expected by some computers. We also initially added an offline switch as a nod to the fact that many old printers had one but we’ve since changed the software to support different functions on that switch such as swapping page sizes or printer types.”
The software is written in C and it makes use of a single capture process that runs constantly. “It watches for incoming data, spooling it to a temporary file and sending the acknowledge and ready signals as we process each byte,” Rich continues. “That process also has to deal with 7-bit or 8-bit data, the position of an offline switch and different timing mechanisms.”
There are two background processes: “One handles the three LEDs on the HAT which can be controlled externally by the user if they wish and the other is the all-important printer emulator.” Since there have been so many different printer types over the years, testing has been a major challenge. “We’ve had to work alongside users to identify and address issues particularly around equipment which does not fully implement the Centronics protocol or where there is little or no information about programming.”
Ink-spiring
Such is the lack of information about some original printers, Rich has sometimes had to rely on old faded printouts or photos on the internet. “We’ve been able to reverse engineer the printouts mainly using a Sinclair QL emulator in the first instance to understand what the data means,” he says. As a result of all of this, different printer emulators have been developed for each printer type.
“They all include standard classes for reading the captured bytes from the temporary file and graphics routines and creating the PDFs,” Rich explains. “The printer emulator is responsible for interrupting each captured byte and determining whether it is data for processing, text or a printer command – for example, an ESCape code sequence.
“We then create a PNG of the printed page in memory using those printer commands to set the position on the page and draw any text or graphics. Once the capture process indicates that it thinks the end of the print job has been reached, or we have filled a page of data, the PNG is converted to a PDF for printing or storage.”
Given the amount of work involved, it’s surprising to hear that the project was created rather quickly. “Thanks to a contact in Germany who had previously developed hardware for the Sinclair ZX81, the initial hardware and basic Epson printer emulator only took six months to develop,” Rich says. “Getting the product readyfor manufacture by a well-known Raspberry Pi supplier took a further 12 months, although thanks to a production issue picked up after the initial batch of boards were received and sold, it took another six months before we had a v4 Retro-Printer.”
Not that the work is complete. Development is still ongoing as Rich meets new challenges and old printer technologies. “We have found a niche among retro computer users and industry alike, with uses from the humble ZX Spectrum and Commodore 64 through to various commercial flight simulator and industrial production lines,” he says. “In some cases, we have extended the useful life of multi-million pound equipment which would have needed complete replacement for the sake of a working printer.”

