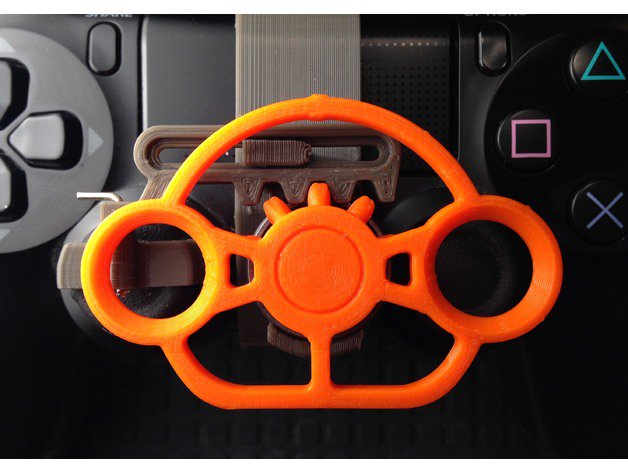
Want to make your video gaming experience even more realistic? New York-based designer Brent Scott has created a 3D printable mini steering wheel that you can mount onto your Xbox One or PlayStation 4 controller.
As the video game graphics slowly become on par with our own reality, they create an immersive experience that is being enjoyed by people both young and old. However, as realistic as your favorite racing title may be, it’s hard to feel like you’re actually behind the wheel when all you’re doing is tilting your sticks and mashing some buttons.
New York designer Brent Scott– known on Thingiverse as pixel2 – has recently created an incredible 3D printed attachment for Xbox One and PlayStation 4 controllers. This mini rack and pinion steering wheel was made to enhance your experience with racing games, allowing you to steer your virtual vehicle of choice using your controller.
No need to start a console war either… The designer has released a model for both Xbox and PS4 controllers. It’s useful, relatively easy to print, and all you need aside from your 3D printer is a bearing and some glue! So, if you’re planning on doing some gaming this weekend, why not add a 3D printed steering wheel to your controller.
Let’s take a closer look at this project.


3D Printed Mini Steering Wheel: What You Need & How to Build it
Ready to start racing? Here’s what you need to build your own steering wheel.
The STL files for both the Xbox One and PS4 controllers are freely available via Thingiverse. There are multiple parts that make up this steering wheel contraption, so feel free to get creative and mix different filament colors. Aside from your 3D printer, all you need to put this project into overdrive is a bearing from an old fidget spinner or skateboard, along with some superglue.

Once you have the parts printed and your bearing ready, it’s time to move into the assembly process. Taking the 3D printed parts, snap the rack into the pivot, moving it back and forth until the ridges of the print are smoothed out.
Next, mount the bearing onto the frame by gluing the top and bottom edge of the bearing. Make sure that the glue is fully dried before snapping it onto the controller, as the glue can leave some residue on the controller. After snapping the 3D printed rack onto the frame, mount the entire wheel onto the controller.
Slide the pivot down onto the controller’s stick until the ball joint is in the center and the bottom edge of the pivot is parallel with the rack. Finally, center the wheel on the rack and press it into the bearing.
Now you’re finally ready to get behind the wheel and start racing.
Website: LINK

