For many years CNC machining was the purview of well-equipped shops and manufacturing facilities. With the availability of inexpensive control hardware, such as Arduino-based GRBL packages, this type of control has come to the (technically inclined) masses, enabling us to create complicated 2D and 3D shapes automatically.
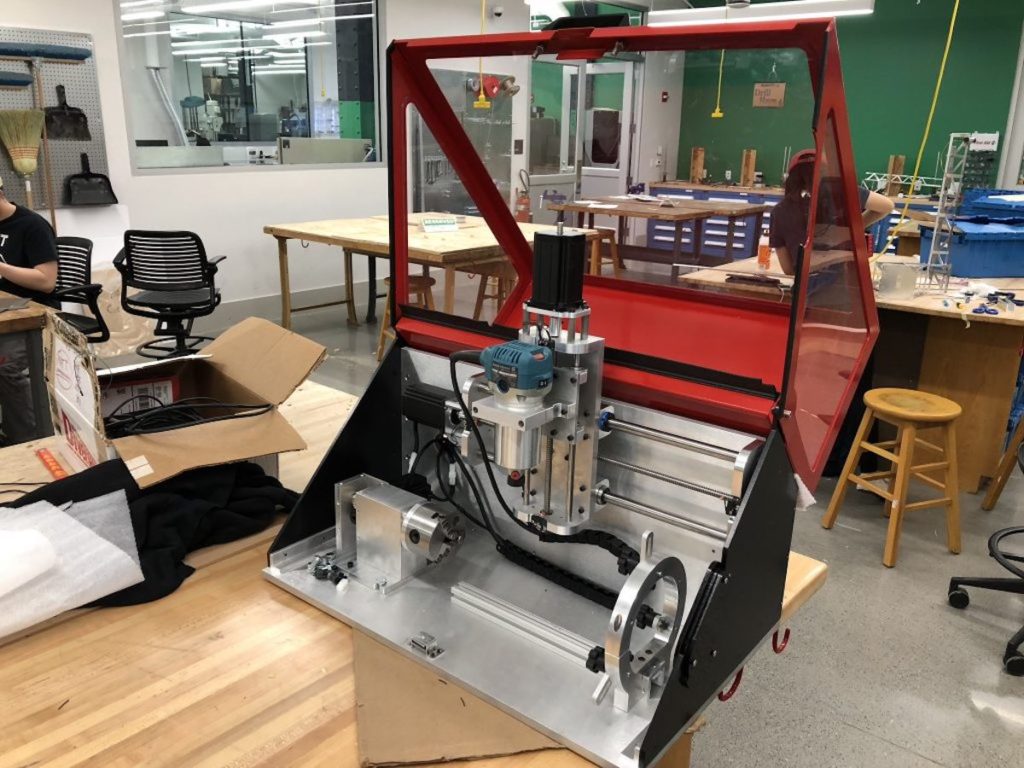
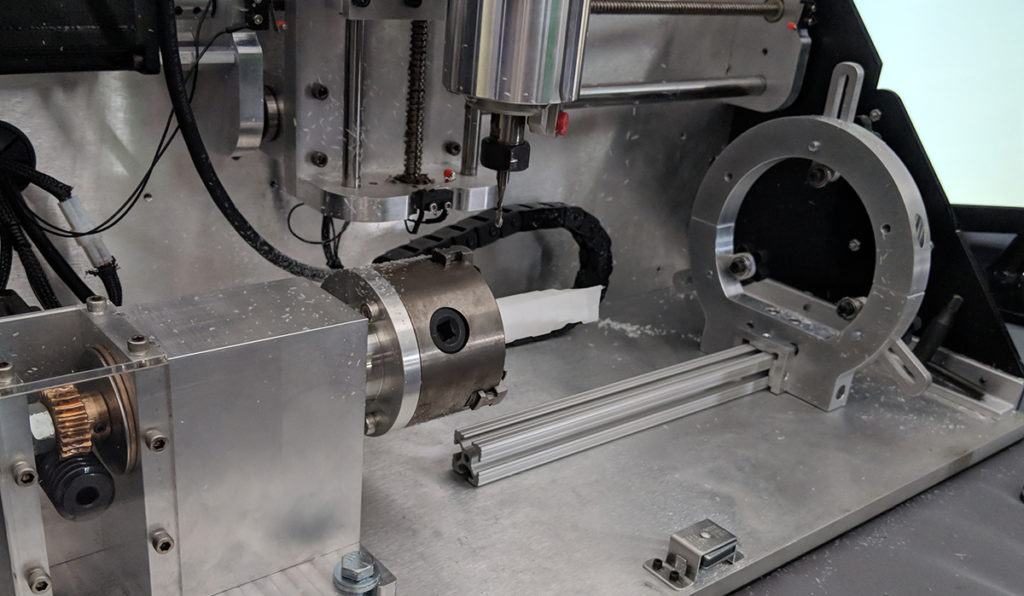
Normally, this means X, Y, and Z axes that control a cutting head, and if you wanted to much further in complexity and cost, you could add a fourth or even a fifth axis to tilt things as needed. The RotoMill, however, seen at World Maker Faire in New York, puts a different “spin” on things, substituting a stepper-controlled spindle for the Y axis. The result is a machine with unique machining capabilities, driven by an Arduino Uno running custom GRBL firmware.

As for now, the CNC can easily mill parts out of softer materials like plastic, wood, and foam, although it is designed to cut aluminum as well.
A three-axis rotary CNC built for the Mechanical Engineering senior design capstone course at Carnegie Mellon University by a team of engineering students. The CNC uses NEMA24 motors for each of the axes, with the X and Z axes actuated by lead screws, and the A (rotary) axis actuated by a worm gear. The spindle is an off-the-shelf Makita hand router, which allows for any router bit to be used.
Each motor is controlled by a stepper motor driver, which are all coordinated by an Arduino Uno running a customized version of the GRBL firmware. This is in turn controlled by a laptop running open-source GCode sending software.
To generate the GCode, we would create a 3D model of the part that we wanted to machine. We then “unwrapped” about the A axis. This basically takes the part and converts it from Cartesian coordinates to Cylindrical coordinates.
– Werbung –To generate the GCode, we would create a 3D model of the part that we wanted to machine. We then “unwrapped” about the A axis. This basically takes the part and converts it from Cartesian coordinates to Cylindrical coordinates.
At this point, we could take the unwrapped part and load it into Autodesk HSM, a popular industrial CAM package. This allowed us to generate a toolpath for machining the part. We basically “fooled” the CNC into thinking that it was a normal, three-axis Cartesian CNC. The trick, however, is that the Y axis is wrapped around and becomes the A axis.
Additional information and photos can be found on RotoMill’s page or Hackaday’s recent write-up.
Website: LINK
Schreibe einen Kommentar
Du musst angemeldet sein, um einen Kommentar abzugeben.