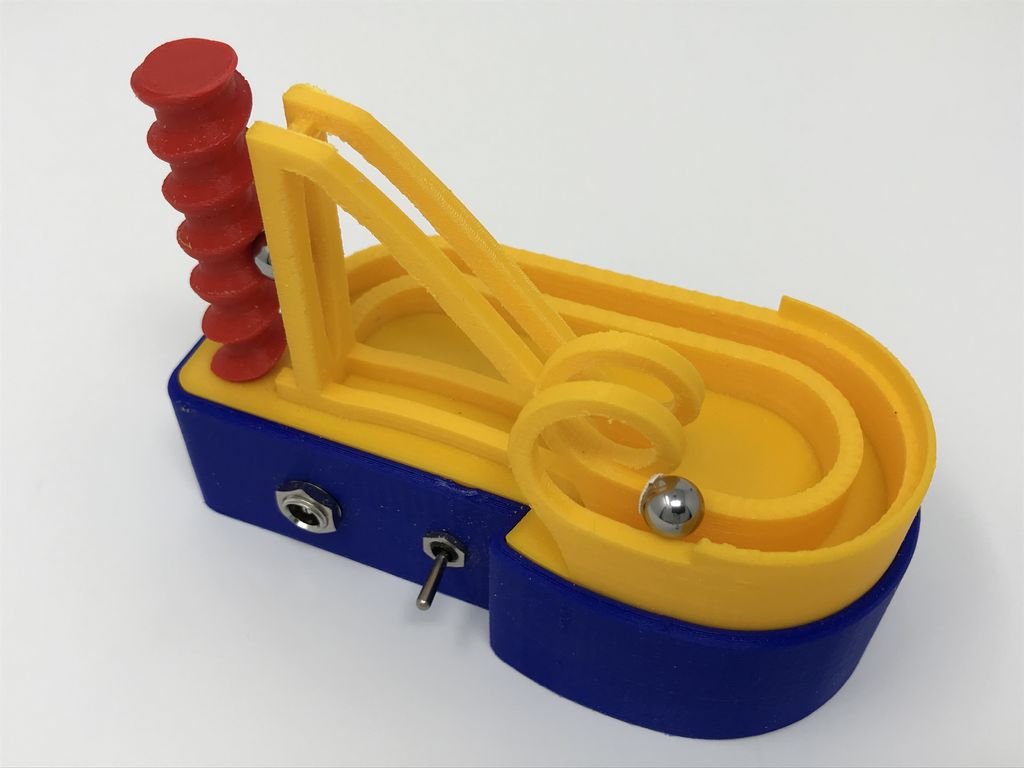
Maker and Instructables regular Greg Zumwalt has created the 3D printed Marblevator Mini, a marble machine with a high speed loop mechanism that can handle over 324,000 marble runs per day. Check out how you can build this jaw-dropping project yourself!
Most of us can remember the childhood joy that arose when playing with marbles, a simplistic and sometimes colorful spherical toy that you could just watch roll around for hours. Outside of being a popular knickknack for kids, marbles can also be used to demonstrate the laws of physics.
You’ve probably seen or at least heard of a marble machine, which is a ball-run contraption that sends the marble through loops and tunnels until it reaches the end, where it is elevated back up to start the rollercoaster ride over again. And get this… you can easily 3D print your own apparatus to send marbles into this cosmic loop.
Greg Zumwalt, a retired software company owner and current full-time maker, recently shared the 3D printed Marblevator Mini, a marble machine capable of reaching seriously high speeds. In fact, it’s the fastest version that Zumwalt has ever created (and he’s made a few), capable of 324,000 marble runs in a single day. He conducted a stress test for over 29 hours without losing a single marble, all while looping 10 marbles at a time.
We previously covered one of the maker’s recent project, an incredible 3D printed mechanical hummingbird. Now, we’ll dig into his latest concoction: the Marblevator Mini.
3D Printed Marblevator Mini Machine: What You Need
If you want to build your own 3D printed Marblevator Mini, you’ll need to get the STL files from Greg Zumwalt’s Instructables post. There are only three individual models to 3D print. Aside from your 3D printer and some different shades of filament, there’s a few other supplies you need to pick up (though some of them are optional).

3D Printed Marblevator Mini Machine: Putting it Together
Before getting into the assembly process, you’ll need to 3D print the “Base.stl” and “Auger.stl” (at .15mm layer height, 20 percent infill, no supports) and the “Track.stl” (.15mm layer height, 20 percent infill, with support material). Once the three parts are printed, test fit and sand down the parts to ensure smooth movement and a snug fit.
Next, solder the wires from the power supply to the motor and make sure it turns clockwise when looked at from the motor shaft end. If you’re using some of the optional components, such as the coaxial power jack, you’ll have a bit more soldering to do, but Zumwalt lays out those steps in his Instructables post.
To assemble the Marblevator Mini Machine, insert the servo motor into the “Base.stl” model, followed by the mounting the “Track.stl” and finally the “Auger.stl” onto the motor shaft. Again, make sure that everything fits tightly, especially the track, as this will have an impact on the performance of your marble machine.
Finally, it’s time to test out this high-speed looping mechanism. Place the 8mm ball bearing on the top of the track and let it roll. At this point, it should traverse smoothly down the track without jumping or falling short of the auger. If not, you’ll probably need to do a bit more sanding and filing, but that’s a small price to pay to obtain the power of physics!
If you want to build your own Marblevator Mini, check out the full scoop on Instructables.

Website: LINK


