Small but mighty
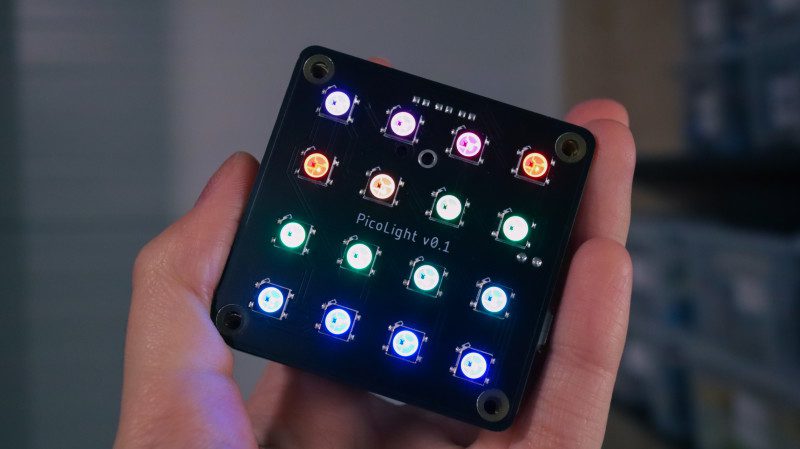
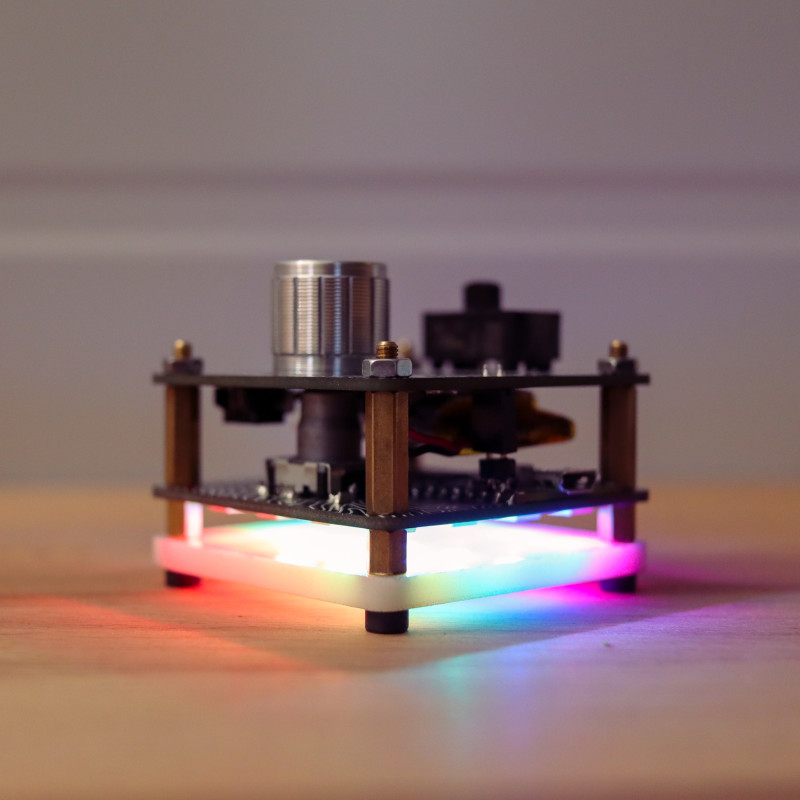
Alexandra describes PicoLight’s user experience as “pretty simple”. It’s made up of two fully customised PCBs and an acrylic panel sandwiched together. One PCB is a LiPo battery shield including a charging circuit and a power switch, while the other PCB is a 4×4 NeoPixel matrix with a Raspberry Pi Pico soldered onto the back. It also features a rotary encoder with a push-button, “used to switch between the functioning modes: colour adjustment, brightness adjustment, and rainbow mode, in which the LEDs cycle through all the colours.”
The team initially connected an external battery to Pico’s micro USB port, but Alexandra says that they soon realised that portability was key, “so we ended up designing our own battery shield as well.”
All of this has resulted in a very neat-looking and compact end product. As the PicoLight measures just 52×52 mm, they were a little concerned about how they would fit all of the features on it, but “then it hit us that we can actually build vertically, and add a new layer for every new feature we want to integrate, such as the battery charging module,” says Mihnea.
They’ve found it a useful tool on a day-to-day basis and while PicoLight’s main purpose is adding a “dash of colour to macro photography… we’ve also used it to add a rather nice touch to video calls,” Mihnea adds.
In the limelight
The response to PicoLight received so far has been hugely encouraging. “PicoLight ended up being much more popular than we’ve expected,” says Alexandra. “Some of our photographer friends asked for PicoLights to use in their shoots.”
While considering a few improvements, including the possibility of using the RP2040 chip on a custom board rather than the entire Pico, Constantin tells us that since the feedback has been so positive, and everybody asked where they can buy it, they are pondering crowdfunding the project to bring it to mass production.
The team are well-accustomed to using Raspberry Pi boards in their projects. “We have worked a lot with Raspberry Pi development boards for various IoT projects,” says Constantin, “like automated points of sale, magic mirrors, and automated crypto trading bots to name a few, and we are excited about exploring the Pico microcontroller range.”
They have also, generously, made this project open-source, as Constantin explains: “We foresee using the Raspberry Pi variants in lots of future projects since they offer so much flexibility and the support of the community is so good. We’re also actively giving back whenever we can by open-sourcing our [Raspberry] Pi-based projects.”
If you’d like to try and make your own PicoLight, step-by-step instructions are available on Hackster, and Mihnea thinks that any intermediate-level maker with a hot plate or DIY reflow oven would be able to achieve this make, as the right tools “make short work of this project.”


Schreibe einen Kommentar
Du musst angemeldet sein, um einen Kommentar abzugeben.