The topline specs for the Monoprice Select Mini are a build area of 120 x 120 x 120 mm, which is roughly the height of a can of Coke. The highest print resolution is 100 microns, with a heated build plate, and a printing speed of 55 mm per second.
Files can be uploaded to Monoprice Select Mini via a microSD card slot or a USB connection. The manual says that compatible slicing software — the application you’ll need to use to prepare objects for printing — is Cura, Repetier-Host, ReplicatorG, and Simplify3D.
What this means is that the Monoprice Select Mini can parse standard G-code, and is not confined to proprietary software. For the purposes of this review, we used Cura.
Similarly, the Monoprice Select Mini doesn’t require special filament and can accept any standard 1.75 mm spool of PLA or ABS thermoplastic. For our testing, we opted to use ColorFabb PLA in sky blue.
The two aspects concerning software and filament are incredibly rare at this price level. Other 3D printing manufacturers like M3D Micro and XYZprinting tend to impose closed software or filament, which locks you into their operational ecosystem for the long-term.
The setup of the Monoprice Select Mini is fairly easy. You should be up and printing within 20 minutes or less.
Inside the box you’ll find the printer, an AC power adapter, a hex key for leveling the bed platform, a dinky plastic spatula for scraping prints off the bed, a microSD card with 256mb storage capacity, and a micro USB cable.
A scrap of paper has basic setup instructions and then points you towards a URL where you can download the full manual for Monoprice Select Mini.
There’s also a rectangular length of folded sheet metal inside Monoprice Select Mini, and its purpose is not immediately clear. Turns out it’s a spool holder that clips onto the side of the main unit.
Important to note is that the Monoprice Select Mini doesn’t come with any filament. Make sure you have a 1.75 mm spool of your favorite material ready to go or order it at the same time as the printer.
For setup stage, you have to navigate a full-color LCD interface with a click-wheel. The menus in Monoprice Select Mini are clearly structured and well thought out. Via the interface, you initiate the process of calibration, preheating the hotend, and then loading up your filament.
The calibration is a bit tricky; this is supposed to have been set at the factory, and you should be able to slide a sheet of paper between the print bed and the hotend. If you can’t, you have to use the hex key to tweak the springs at each corner of the print bed. This can take some time before you get it juuuuust right.
Which brings us the first quirk (of many); the heated bed of Monoprice Select Mini is an aluminum plate with no protective covering except for a sheet of builders tape. This is quickly going to degrade over prolonged use, so you should ensure you have a roll of tape ready to replace it as and when you need to.
The next quirk is that the AC power adapter on our unit died within 12 hours of use. This was *incredibly* annoying, but relatively easy to replace with a generic power adapter for around 30 bucks or so. Something to be aware of in case it happens to you…
One of the most appealing things about the Monoprice Select Mini is the build quality; it’s sturdy and robust, with a folded sheet metal enclosure housing the electronics. It’s built like a tank, but also compact and portable, so you won’t be concerned about damaging it in transport.
This is a Cartesian style fused filament fabrication (FFF) printer, with a one-sided arm holding the print head in the style of a Printrbot Simple (at Amazon). The printer only has a single fan for cooling the nozzle, however, which may limit your options for exotic filaments.
At the top of the main pillar is a spring-loaded “quick-release” extruder with a steel gear. It’s a nice design, and it feeds the filament to the hotend using a Bowden cable setup. Again, this may limit your options, especially if you were hoping to print with flexible filaments.
The Monoprice Select Mini hotend has an extruder diameter of 0.4 mm and can reach temperatures of 230°C. We weren’t able to ascertain how easy it would be to replace the nozzle, and this is an important factor in the long-term. Nozzles are prone to degrade over time and will need replacing.
Some more quirks we noticed; the print head has an auto-leveling probe attached, so in theory it should have intelligent positioning feedback. The extruder will know when it’s hit the build plate, in other words, and can adjust itself accordingly to make calibration more simple.
In practice, however, the probe only checks one corner of the build plate, as opposed to all four. On that basis, the auto-leveling doesn’t seem all that intelligent!
UPDATE 25/08: We’ve been told in the comments that this isn’t actually an auto-leveling probe, but a Z-home microswitch that lets the printer know when to stop lowering the head so it doesn’t crash into the build plate. Apologies for the confusion!
The next quirk is that the control interface tells us that wi-fi has been deactivated, and there’s no way to switch it on. It appears that wireless connectivity is an available feature of the Monoprice Select Mini, but Monoprice have chosen to deactivate it in the firmware.
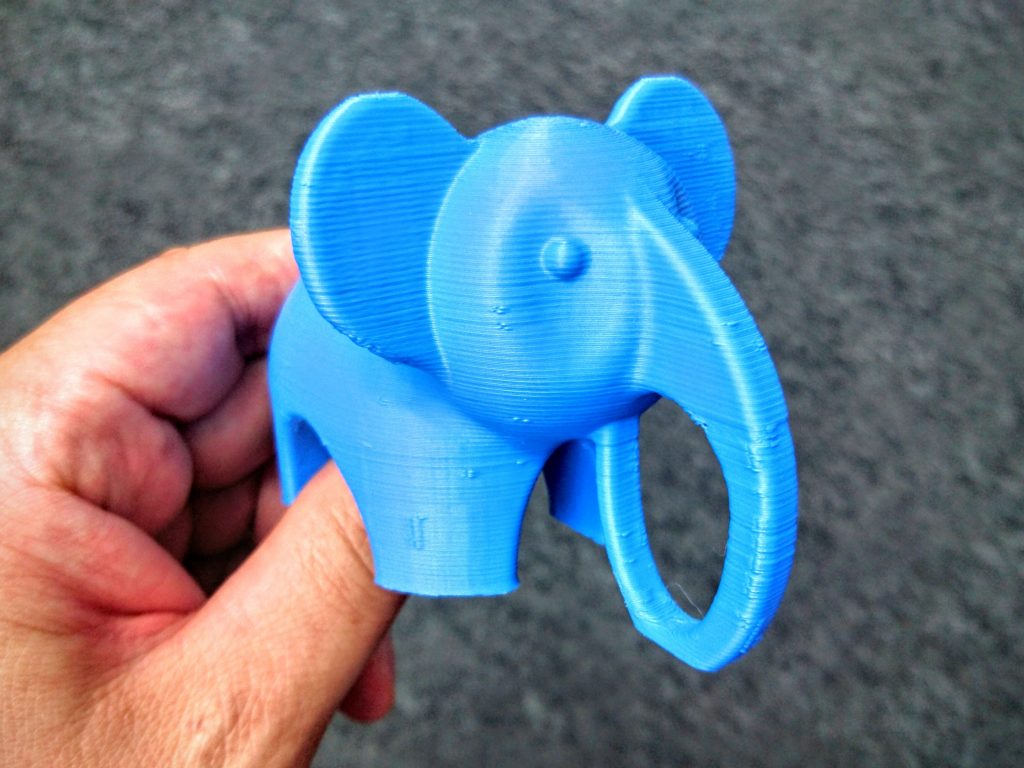
Preloaded on the microSD card are a pair of models for printing, a cat and an elephant. Presumably, these have been optimized to best show off the Monoprice Select Mini performance. With that in mind, we started on these models before slicing some of our own.
The first thing we printed was a the cat, with a resolution we’re guessing was 200 microns. Details came out fine and clear right up until the final layers, whereupon the tips of the cats paw and ears became garbled. This happened three times on three separate attempts.
Analysing the G-Code in Simplify3D, it appears that the print head is speeding up at the final layers, right at the limits of 55 mm/s, hence the repeated failure. It has to be said, the fact that the Monoprice Select Mini is supplying a sample model that’s doomed to fail — and to a potential audience of first-time users no less — is pretty staggering.
The second thing we printed was the elephant, at 200 microns and 10% infill, and there were no problems here. The Monoprice Select Mini did an admirable job with things like bridging and overhangs, and the retraction was tight enough that stringing was non-existent.
Moving on to slicing our own models, we opted to use Cura software as per the manufacturer recommendation. John Biehler has supplied some excellent Cura settings in his review of the Monoprice Select Mini, so we used the same.
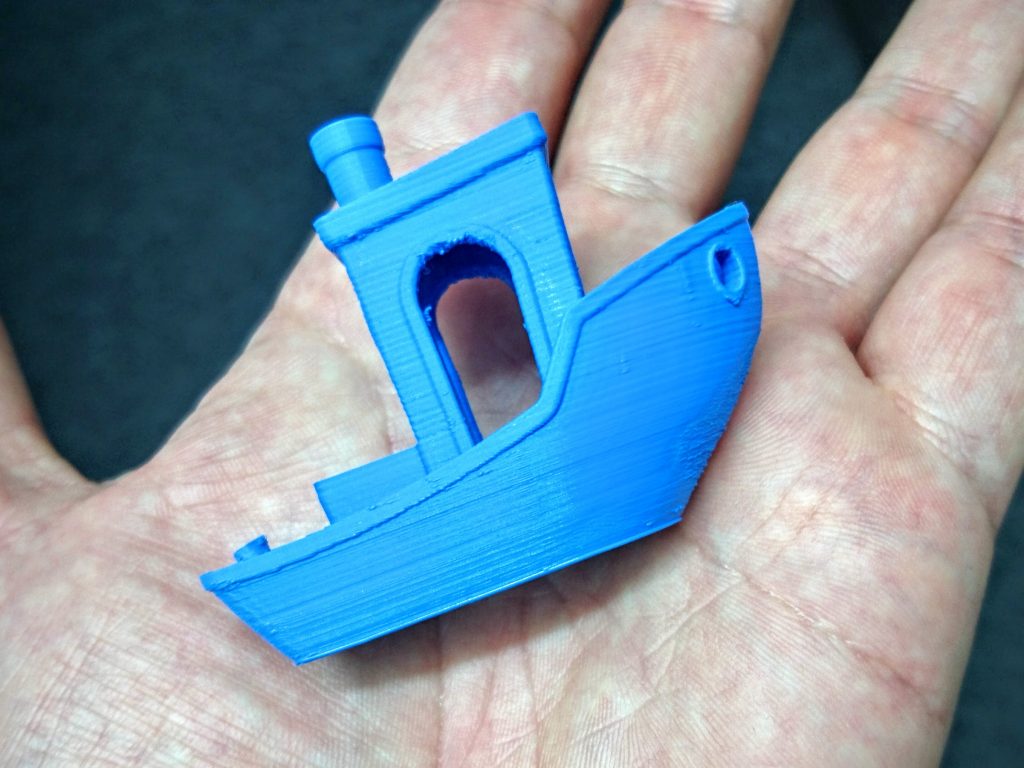
The models we printed were a 3DBenchy and a Graphica Mega Ghost at 200 microns and 10% infill, a V29 whistle at 200 microns and 100% infill, and another 3DBenchy at 100 microns and 10% infill.
Basic details came through pretty well on all of the 200 micron models. The MP Select Mini didn’t seem to struggle too much with small unsupported spans and overhangs, although there is the noticeable occurrence of blobs and zits. Layers also remained fairly consistent along the X and Y axes.
The V29 whistle sounds exactly as loud and irritating as intended, which means the chambers were successfully printed without obstructions. The Graphica Mega Ghost and its obscenely long tongue also printed intact, where the hinge for the tongue was printed in one piece and glided smoothly.
The 3DBenchy at 100 microns also printed intact and the quality of the detailing was impressive. This is a $199 machine, remember. The only major error was the prow of the boat, where there was some significant “wurfling” of the layers.
In general operation, prints tended to fail when the filament spool snagged itself, or when we failed to apply enough adhesive glue to the print bed. We can’t attribute these issues to the Monoprice Select Mini itself — it’s an occupational hazard of FFF printing — but it’s still frustrating when it does happen.
A minor niggle is that during operation the print bed slides forward towards the front of the machine, which can obstruct access to the click-wheel controls.
One more quirk is that the temperature of the hotend seemed to have a margin of error of about 5°C. For example, if the temperature was set to 215°C, the control panel indicated that it was hovering between 213°C and 217°C.
This didn’t impact too badly on our PLA-based test prints, but such inconsistency will cause problems when printing with materials more sensitive to temperature changes.
UPDATE 25/08: We’ve been asked to supply more examples of printing at 100 microns. Here’s a low-poly Maoi bust, scaled up by 50% from the original size, and printed at 100 microns with 30% infill. It turned out beautifully, with the exception of the overhang on the chin; it has the same wurfling effect as the 3DBenchy at the same resolution.
Website: LINK


