To increase the range of features and firmware safety of Arduino products, we decided to release a new bootloader based on MCUboot. Here is a quick introduction on everything you need to know about it.
Introduction to MCUboot
MCUboot is a secure bootloader solution offering fail-safe firmware authentication and secure firmware update mechanism, plus many other functionalities such as update encryption, update rollback, and application bootstrap.
MCUboot does not depend on any specific hardware and operating system; as of writing, the following RTOS are supported: zephyr, nuttx, mynewt, and mbed.
Our efforts have been focused on keeping things simple and reusing the existing OTA design in place on Arduino boards.
MCUboot base blocks
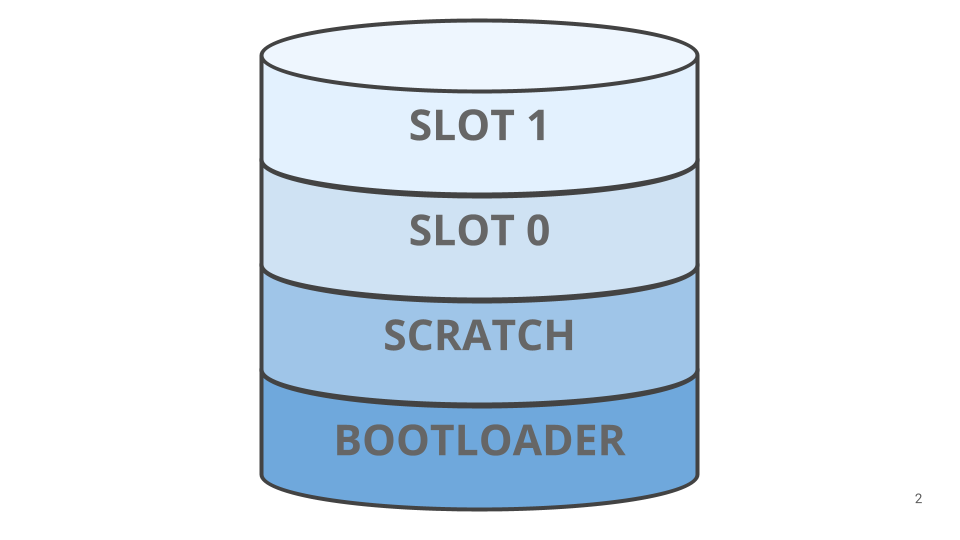
To access the microcontroller flash, MCUboot relies on the operating system driver layer. MCUboot supports multi-image booting, therefore its configuration can be difficult; for a basic MCUboot setup two flash areas have to be defined.
- SLOT 0: Represents the portion of flash containing the current application image;
- SLOT 1: Represents the portion of flash containing the update application image.
An additional flash area is needed to support MCUboot swap scratch algorithm, which is called SCRATCH.

For switching between slot 1 and slot 0 MCUboot offers multiple algorithms.
- Overwrite: This is the basic upgrade method supported by MCUBoot and it simply copies SLOT 1 over SLOT 0; rollback is not supported but it is the fastest way to upgrade an image.
- Swap Scratch: This upgrade method relies on an extra flash area where data is temporarily stored during image swapping. Using this method we have the possibility to recover the initial application image if something is not working with the updated one. One of the major drawbacks of this upgrade method is flash wearout, because the scratch area is written and erased multiple times during a swap.
- Swap Move: Instead of using an external scratch area, this upgrade method uses some extra space inside SLOT 0. The main advantage of swap move over swap scratch is the reduced wear factor of the flash.
To be able to perform all operations and checks, MCUboot needs to store some metadata alongside the application image. This is done using a tool called imgtool that processes the application binary image, reserving space and adding all the required information to perform image verification and implement a fault-tolerant swap.
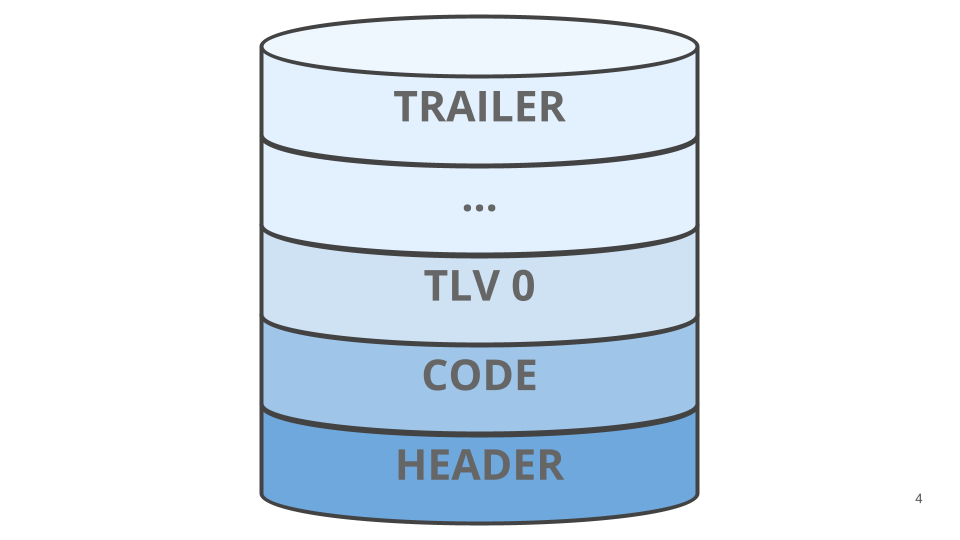
Looking into an image slot in more detail we can split it into these flash areas:
- Header: Mostly used to indicate the length of other parts of the slot; header size, code size and TLV size. It also includes The application load address and the slot magic number used to identify a compatible MCUboot image.
- Code: The application binary.
- TLV: Sequence of tuples with tag length and value. For example, image hash, key hash, image signature.
- Trailer: Used to store swap status during image swaps.

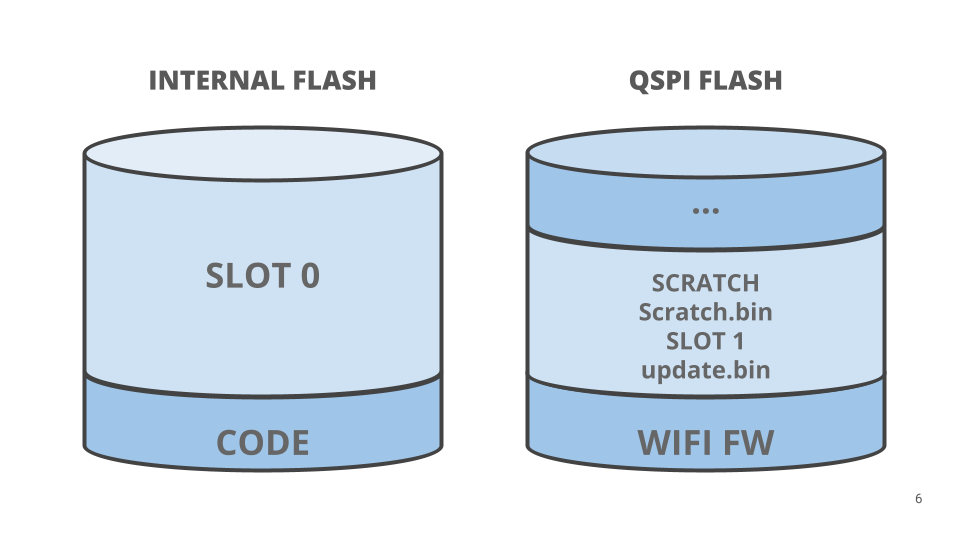
In order to support Arduino OTA, the update file is written to memory and processed by the bootloader to update the application. With regards to Portenta products, the file is placed into the second partition of the board’s QSPI flash. This means that our SLOT 1 is placed into the QSPI flash. The default swap method it uses is swap scratch. The scratch region, mapped to a file called scratch.bin, is placed into the QSPI flash. When encrypted images are chosen firmware copies between external memories are always encrypted; by default, MCUboot decrypts an update, taking care of the needed offsets, before writing it into the scratch area. To keep data safe an extra step is executed re-encrypting the whole scratch data before writing it. When images are rolled back data from unencrypted internal memory is encrypted before being written into SLOT 1.
Note: Using this flash layout, it’s possible to load an update over the Internet, mounting the device as mass storage or using its DFU interface.

When a new update is available and marked as pending at the next reset, MCUboot will take care of swapping the slots and applying the new application image.
Security aspects
MCUboot uses two different keys to provide image signature verification and image encryption. For image signature verification the private key is used by imgtool to sign the update, and the public key is used by MCUboot to verify it.
For image encryption the elliptic curve integrated encryption scheme (ECIES) is used with a secp256r1 ephemeral keypair and a random AES key used to encrypt the image.
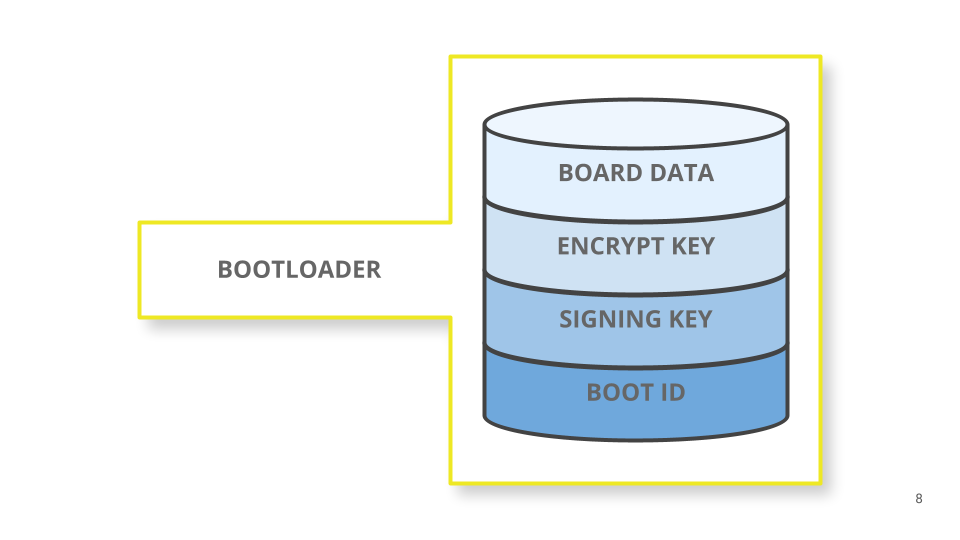
In both cases MCUboot needs to know its part of the input keys. Therefore, they are saved in the flash memory alongside the bootloader binary.
Looking closely at the bootloader flash sector we will find the following data:

By default, keys are not loaded in flash, and the bootloader will boot any sketch. Once the keys are loaded MCUboot will always verify the image signature and boot only valid sketches; if an encrypted update is detected by reading the TLVs, MCUboot will unwrap the encryption key and decrypt the image on-the-fly while moving it into the internal flash.
Click below to give the Arduino MCUboot a try, and join us on social media or in the forums to tell us what you think!
Website: LINK


