The Formlabs Form 2 is our pick for the “Best Resin 3D Printer of Fall 2018”. Check out our Formlabs Form 2 review to find out why.
When it comes to 3D printing, FDM printers take all the glory; Ultimakers, Prusas, and Crealitys are talked about constantly. Their machines offer makers, hobbyists, and semi-pros great creative tools. But FDM printers aren’t the only choice when it comes to 3D printing.
If you are looking for professional printers that can deliver stunning details, stereolithography (SLA) machines are the right choice.They work with resin instead of thermoplastics. As of 2018, there are cheap SLA machines targetting hobbyist – and then there’s the category of SLA 3D printers that can be found in labs, professional fabs, universities, and engineering spaces.
Formlabs holds the number 1 position for several years now. At $3,500 / €3,925, their flagship 3D printer Form 2 doesn’t come cheap. But it’s a fraction of the price you would pay for a 3D Systems ProJet 6000 HD.
Don’t Miss:
Also for a desktop machine, the Formlabs Form 2 has a quite powerful optical engine. The 250mW violet laser is guided by custom-built galvanometers, delivering prints in impressive quality. For the purposes of this Formlabs Form 2 review, we didn’t encounter a single misprint.
Formlabs Form 2 Review: Pros
- Print quality is brilliant
- Easy to setup and maintain
- Great interplay of hard- and software
- Reliable and predictable results
- Good software slicer
- Great user interface
- Relatively silent operation
Formlabs Form 2 Review: Cons
- No print without post-processing
- Not faster than FFF 3D printers
- Standard support structures are very dense
- Changing resin is easier than with the Form 1+, but still no trivial task
- Consumables (resin and tank) and the printer are expensive
Formlabs Form 2 Review: The Verdict
If you’re looking for a reliable, professional, high-quality SLA 3D printer, look no further. The Formlabs Form 2 is a workhorse that delivers stunning results.

This high-class SLA 3D printer isn’t aimed at the regular consumer who wants to dabble in 3D printing. It’s for people who have a clear use case and a budget — so we’re talking about semi-professional and professional users.
However, this SLA 3D printer is an excellent machine for prototyping. The Formlabs Form 2 can be a valuable addition to an engineer’s office, a dental lab or a jewelry designer — it really does turn your ideas into reality. It even can be used to manufacture (very) small batches.
What makes this SLA 3D printer interesting is the consistent quality. While FFF printers need a constant balancing of parameters, temperatures, filaments, and extruders, the Formlabs Form 2 just delivers without you having to worry about quality. If you remember the old “Get a Mac” Apple Ads pointing out the differences between Apple and Windows-PCs — that pretty much sums it up.
But there are drawbacks, and they have to do with SLA technology itself. First of all, working with resin means you will have to do some post-processing. Formlabs offers a special post-production kit for the Form 2, which we found expensive but invaluable.
Secondly, neither the printer nor the resins are a steal. For most people, the price of $150 for a liter of resin is too high, and over the longer term the cost of consumables will add up. Thirdly, the print dimensions are limited to 125 × 125 × 165 mm — if you are prototyping in bigger dimensions, you have to search for alternative solutions.
But if you are looking for a 3D printer that just delivers with (nearly) every single print, you have found your match.
Formlabs Form 2 Review: The Long Read
Before we dig deeper in this Formlabs Form 2 review, here’s a short preamble on the differences between an SLA 3D printer and FFF 3D printer.
Fused Filament Fabrication (FFF) is the most common desktop 3D printer technology. A FFF printer feeds plastic filament into a heated extruder and prints layers with the molten material. FFF 3D printers are versatile machines and can use different materials. But most of them lack predictability when it comes to results.
Exactly this predictability is one of the strengths of SLA 3D printers like the Formlabs Form 2. It points a high precision laser on a tray of liquid resin, which causes a thin layer to solidify. This chemical reaction allows for the creation of water-tight printed parts. The 3D printing speed is comparable to FFF machines when comparing layer thickness and density. SLA printers are also known for printing high-detailed objects.
Formlabs Form 2 Review: Unboxing and Setup
Setting up the Form 2 was a breeze. Our Formlabs Form 2 review sample came securely packaged. We found every part nicely labeled. There’s a helpful setup guide on the Formlabs website. Even if you’ve never assembled a printer before, you can do this in no time.
Just put the printer on a flat and sturdy surface (a.k.a. “table”). The dimensions of the printer are 35 × 33 × 52 cm, which is big, but not huge compared to other 3D printers.
Next, you open the orange cover and attach the build platform. If you are new to SLA 3D printers, you might be surprised to find that the build platform of the Formlabs Form 2 hangs upside down… that‘s because the object is “drawn out” of the resin, so to speak.

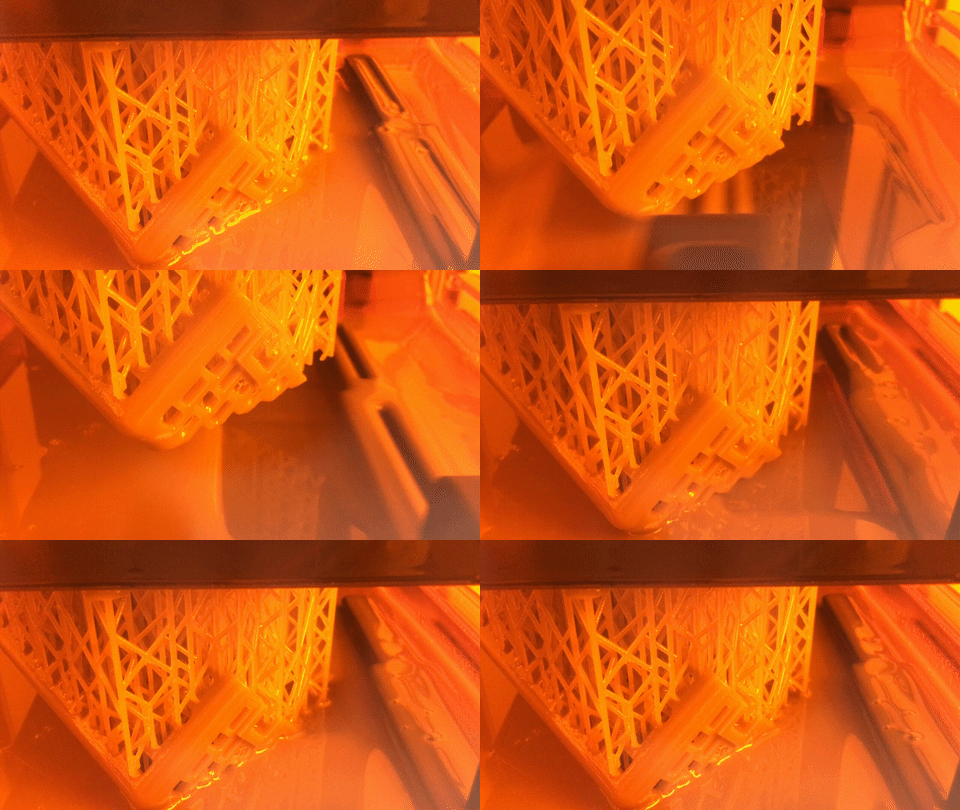
After that, you put the resin tray in place and click in the tray wiper. The latter is an improvement over the previous generation Form 1-series. Every time a layer is finished, the print bed moves up a little. Then the wiper moves and makes sure the resin is spread equally on the tray. The result? You’ll get fewer misprints.
After this step, you slide the Form 2 resin tank into the printer, plug in the power cord, and start the printer. The tray is automatically filled with resin. We didn’t have to do any calibration (unlike with the Form 1 and Form 1+).
Last stop is adding the Formlabs Form 2 to your wireless network. As an alternative, you can use the USB- or Ethernet ports to transfer files.
All in all, setting up the Formlabs Form 2 didn’t take us more than 1 hour.
Formlabs Form 2 Review: Available Resin Types

There are several resin types to choose from. The resins consist of methacrylic acid esters, photoinitiators, proprietary pigment, and other secret ingredients. If you are planning to use your own resins, you will run into problems — the cartridge system of the Formlabs Form 2 is proprietary.
Formlabs offers two flavors of standard resins. The standard resins come in clear, white, gray, and black. A liter of these “bread and butter” resins costs €160 / $150 — that’s not exactly cheap.
The second type of resins for the Formlabs Form 2 are functional resins. They also come in different flavors.
- Tough Resin is good if you want to have more durable or resilient prototypes. The standard resin isn’t strong enough for daily use. They break easily. So this is the one you should order if you’re building functional parts. A 1-liter tank costs €160 / $175.
- Flexible resin is bendable and compressible. You pay $199 for a liter.
- Castable resin is made with jewelers in mind. The resin burns out without ash or residue. The price is $300.
- Dental resin is Class 1 biocompatible. It’s designed to directly print surgical or pilot drill guides. If you don’t have a clue what that is, you’ll probably never need to order it. Price is a whopping $399.
But wait, there are other consumables! First, there’s the resin tank, which — according to Formlabs — should be switched out every 2 liters of resin. A tank will cost you €66. It also comes with the wiper.
You can also buy a second build platform if you want to speed up the workflow in an intensive use case scenario.
Formlabs Form 2 Review: Software
In our Formlabs Form 2 review process, we found the interplay between the software and hardware to be the real beauty of the 3D Printer.
For 3D printing, you need a software slicer to tell the 3D printer what to do. Formlabs have developed their own tool called PreForm. As with other 3D slicers, it lets you import STL files, which are placed on the print bed and displayed in the software. PreForm also auto-repairs broken meshes.
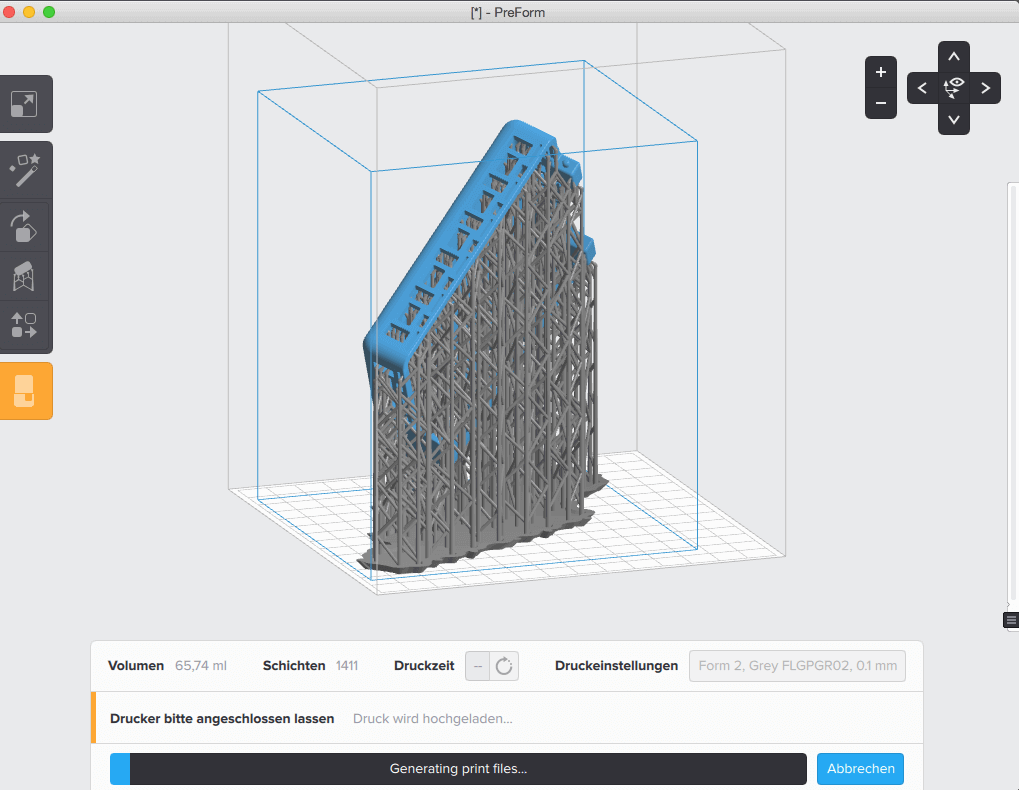
In most cases, you don’t want to 3D print your object directly on the build plate, as you might accidentally scratch it when you try to remove it. To prevent this, Preform invites you to add supports, which are customizable in density and strength. The support structures on the build plate are bent slightly upwards, so you can slide a removal tool under them — that’s clever!
There‘s also a “One Click Print” button, which should be sufficient for most use cases. Unless your 3D object doesn’t fit the printer, you will probably not adjust the size. It’s also possible to place several objects onto the build plate and have it 3D printed in one go.
The software auto-rotates the object and adds support structures where needed. If you’re happy with your results, the software will calculate the layers and give you an estimate on how many layers will be printed and how much resin you’ll need for it. One thing that was somewhat annoying; Preform only shows you the estimated printing time if you click on the field… this should be an easy option to add.
The print is now transferred wirelessly to the 3D printer. If you‘re printing a highly complex and large model, calculating and transferring can take up a few minutes.
To start the print, you have to press a button on the printer itself.
The Formlabs Form 2 will retain most of the 3D prints you’ve already made, so you can start a new print without having to run to the computer again. It’s the little things like these that make this 3D printer a joy to use.
The software can also notify you by mail when the print is finished — that‘s a thing you’d love to see as standard in many FFF 3D printers.
If you’re designing 3D objects, you should know that the minimum supported wall thickness is 0.4 mm, and the unsupported wall thickness is 0.6 mm. A proper design guide can be found at the Formlabs site.
Formlabs Form 2 Review: Printing

It takes the Formlabs Form 2 considerable time to heat up the resin tray to 30 degrees Celsius / 95 degrees Fahrenheit. If you place the printer in a very hot or very cold environment, you might reconsider taking the printer to a more “moderate climate”. When the resin is at the right temperature, the build plate lowers itself into the resin-filled tray.
You can keep track of your print on the touchscreen, on your computer, or even on a smartphone. Formlabs uses a ring in lieu of a progress bar. The outer ring shows the layers, the inner one the progress of the current layer. Also, there’s a constant time estimate of remaining print time.
Over the course of our Formlabs Form 2 review, we found the graphical user interface of the printer to be extremely clear, helpful, and easy to understand. We also liked the LCD touch screen — it’s bright and responsive. The menu isn’t overloaded with information and displays the right choices at the right time. There’s only one button which is used for confirming actions and also serves as the power switch.

The build speed is comparable to FFF machines when comparing layer thickness and density. It’s roughly 1-3 cm/hour along the Z axis when printing at 100 microns. The Formlabs Form 2 can 3D print in 25, 50, and 100 microns.
Formlabs Form 2 Review: Post-Production

Post-production is where SLA printing becomes ugly. If you‘re using an FFF printer, you just pluck the model from the build plate, and you’re usually ready to go. For SLA 3D printers like the Formlabs Form 2, that‘s not the case.
As you’re printing with liquid resin, you will have to remove the print from the plate, immerse it in chemicals, then remove the supports. This can take up a considerable amount of time.
Formlabs offers a finishing kit, which we found extremely helpful. It consists of a rinse station with two buckets, which you partially fill with isopropyl alcohol (IPA).

Before you begin post-processing, you should wear protective gloves and eye protection. Avoid breathing in gas, mists, vapors or spray of resin — or any other chemicals — and wash your skin thoroughly after handling. Working with resin is considered to be relatively safe, but in some rare cases, skin irritations and allergic reactions have been reported.
First, you should put on some rubber gloves. Be careful when removing the build plate. As it’s still covered with liquid resin, the “goo” has a tendency to drip. Next, you need the removal tool to slide it under the “quick release tabs” generated by the PreForm software. With larger prints, you’ll need to pry them firmly from the build platform.
Next you rinse the print; drop it in the tank and leave it there for roughly 20 minutes. For smaller parts, reduce the soak time accordingly. A rinse bottle will help you clean any internal channels of your print.

Allow the (still sticky) print to dry for several hours. As a final step, you remove the support structures with a pair of “flush” cutters. This can be demanding, as the Preform software has the tendency to make the supports a little stronger than needed in order to provide a good print.
In our Formlabs Form 2 review process, we found that too many supports can leave ugly dots on your final print — if you want perfect results, you’ll have to experiment with the support structure settings and also clean them after removing the support. Also, we found it quite hard to remove supports that lie in the inner structures of a delicate print.
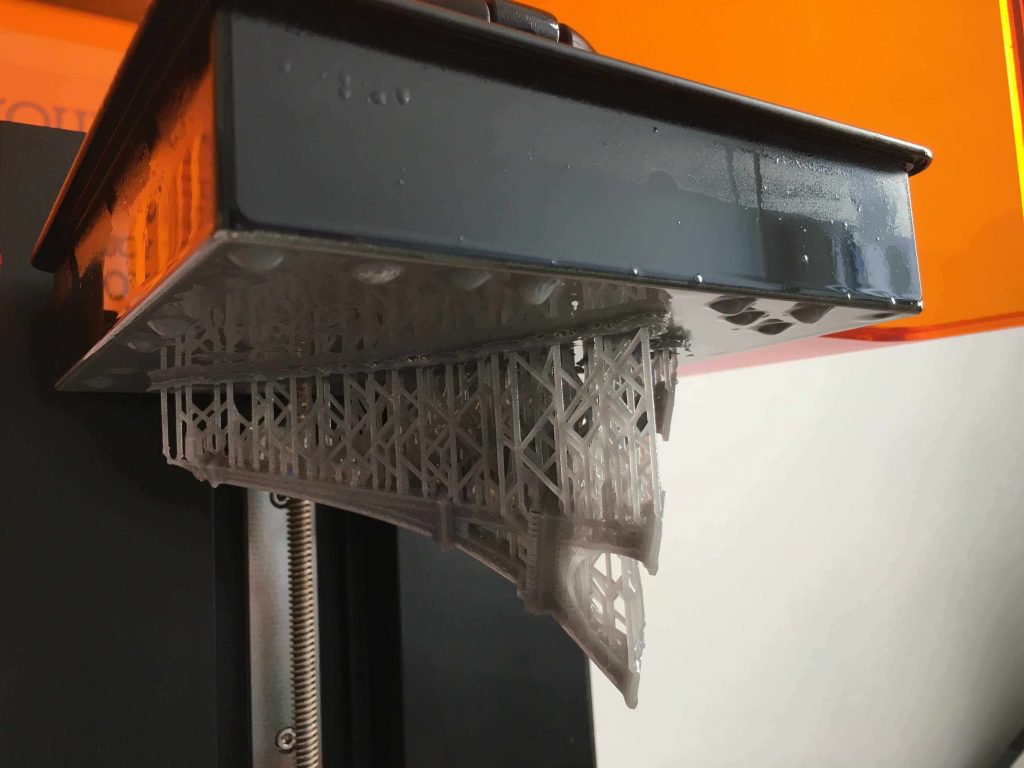
You could even break some delicate pieces from your print, as we did in this example.

You can then finish your prints by spraying them with acrylic paint, or post-cure them in UV lightboxes. Formlabs provide good support information on priming prints.
Formlabs Form 2 Review: Wrapping up
As we’ve stated several times in our Formlabs Form 2 review — this is a stunning machine! We were very impressed with the quality of results this SLA 3D printer delivered, and it did it constantly.
There are some challengers to their crown. If you consult this list of competitors, you’ll find that most rival machines start at $5000 — so for small budgets, the Formlabs Form 2 stays “best in class.” The cheapest alternative we can recommend is XYZ Printing’s Nobel 1, which only costs $1,900, but is said to deliver less quality (we haven’t reviewed this printer yet).
If you just want to print out high detail models only occasionally, you might be better off ordering from a 3D printing service. The costs of the consumables (trays, resin) for the Formlabs Form 2 add up and will dent a hole in a non-professional budget.
But if you are looking for a reliable, professional, high-quality SLA 3D printer you can use on a daily basis, then look no further. The Formlabs Form 2 is a premium printer that delivers stunning results.
Website: LINK


