“I have always loved robots,” Nick tells us. “Building my own autonomous robot has been a goal for me, as long as I can remember. I also wanted to make my robot useful. I am always making things but then end up taking them apart the next week because they didn’t end up being useful. I challenged myself to make this robot useful, and help carry out tasks around the house.”
And so, several years ago, work on the Autonomous Home Robot began and it’s fair to say that the project has evolved over that time. “It started as a tiny remote-controlled self-balancing robot,” says Nick. “Now it is a big robot that navigates around the house!”
Nuts and bolts
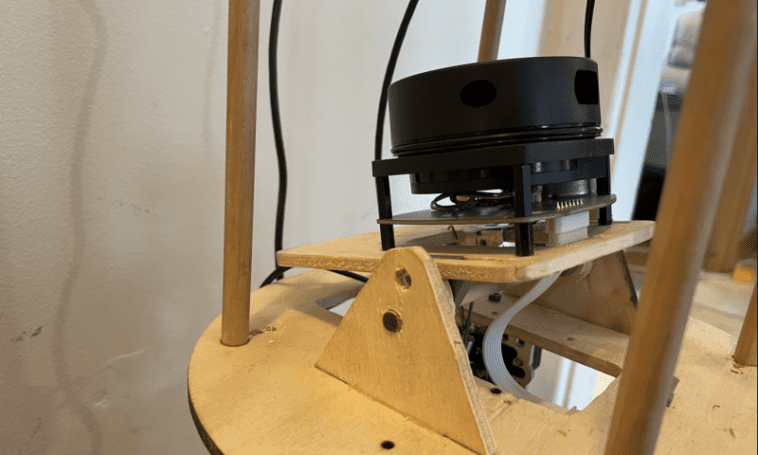
Nick’s robot basically consists of two sections: the base and the head. “The base consists of a lidar laser scanner, Raspberry Pi, and Teensy,” he reveals. “The lidar scanner, which is mounted on a small auto-levelling platform, sends its range data to Raspberry Pi. The [latter] is the brain which takes in the lidar data and streams it over to a master computer for processing. Raspberry Pi also sends drive drive messages to the Teensy, which handles motor control.”
In the head of the robot, Nick has positioned a second Raspberry Pi, an Arduino, and a camera. “Similarly to the base, Raspberry Pi streams the camera feed over to the master computer, and sends head movement commands to the Arduino,” he says.
The robot navigates its way around the house by using various systems that Nick has installed, and it knows where it is in a room by using wheel rotations (odometry). Nick elaborates, “This odometry is then combined with the laser data to make a map. On the map, I can specify a point that the robot will drive to, and the robot will make its way there, while avoiding obstacles.”
Robot research
There was a great deal of technical coding, along with languages and systems, to learn before Nick’s robot came into being, including Python, C, HTML, and OpenCV. The hardest part was to learn Robot Operating System (ROS). “It took a lot of reading and studying to set up the robot. Once I was motivated enough to put in the time to really learn ROS, everything fell into place.”
Nick is the first to admit that his robot is an ongoing project and is continually evolving, but the potential is there for it to perhaps carry things around the home, act as a robotic companion, and more. He’s already made many finely tuned modifications.:“I have added many things to the initial design, like tilting laser scanners, tilting cameras, a rotating head, and even the temporary four-wheel drive base.”
He also has plans for a lot more improvements, “including new motors, making the robot self-balancing, Raspberry Pi 4s, and a big battery so that the robot can completely navigate on its own.”
Nick is clearly very self-motivated and has input many hours of hard work to get to this point. “I asked for feedback recently from my engineer friend who encouraged me to focus on getting the core of the robot working well and stop adding extraneous features. A combination of his help, along with many others, have helped make this robot work!”


