Making player and computer-controlled cars race round a track isn’t as hard as it sounds. Mark Vanstone explains all.

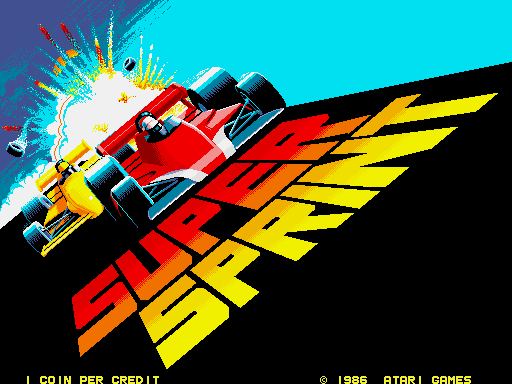
The original Super Sprint arcade machine had three steering wheels and three accelerator pedals.
From Gran Trak 10 to Super Sprint
Decades before the advent of more realistic racing games such as Sega Rally or Gran Turismo, Atari produced a string of popular arcade racers, beginning with Gran Trak 10 in 1974 and gradually updated via the Sprint series, which appeared regularly through the seventies and eighties. By 1986, Atari’s Super Sprint allowed three players to compete at once, avoiding obstacles and collecting bonuses as they careened around the tracks.
The original arcade machine was controlled with steering wheels and accelerator pedals, and computer-controlled cars added to the racing challenge. Tracks were of varying complexity, with some featuring flyover sections and shortcuts, while oil slicks and tornadoes posed obstacles to avoid. If a competitor crashed really badly, a new car would be airlifted in by helicopter.
Code your own Super Sprint
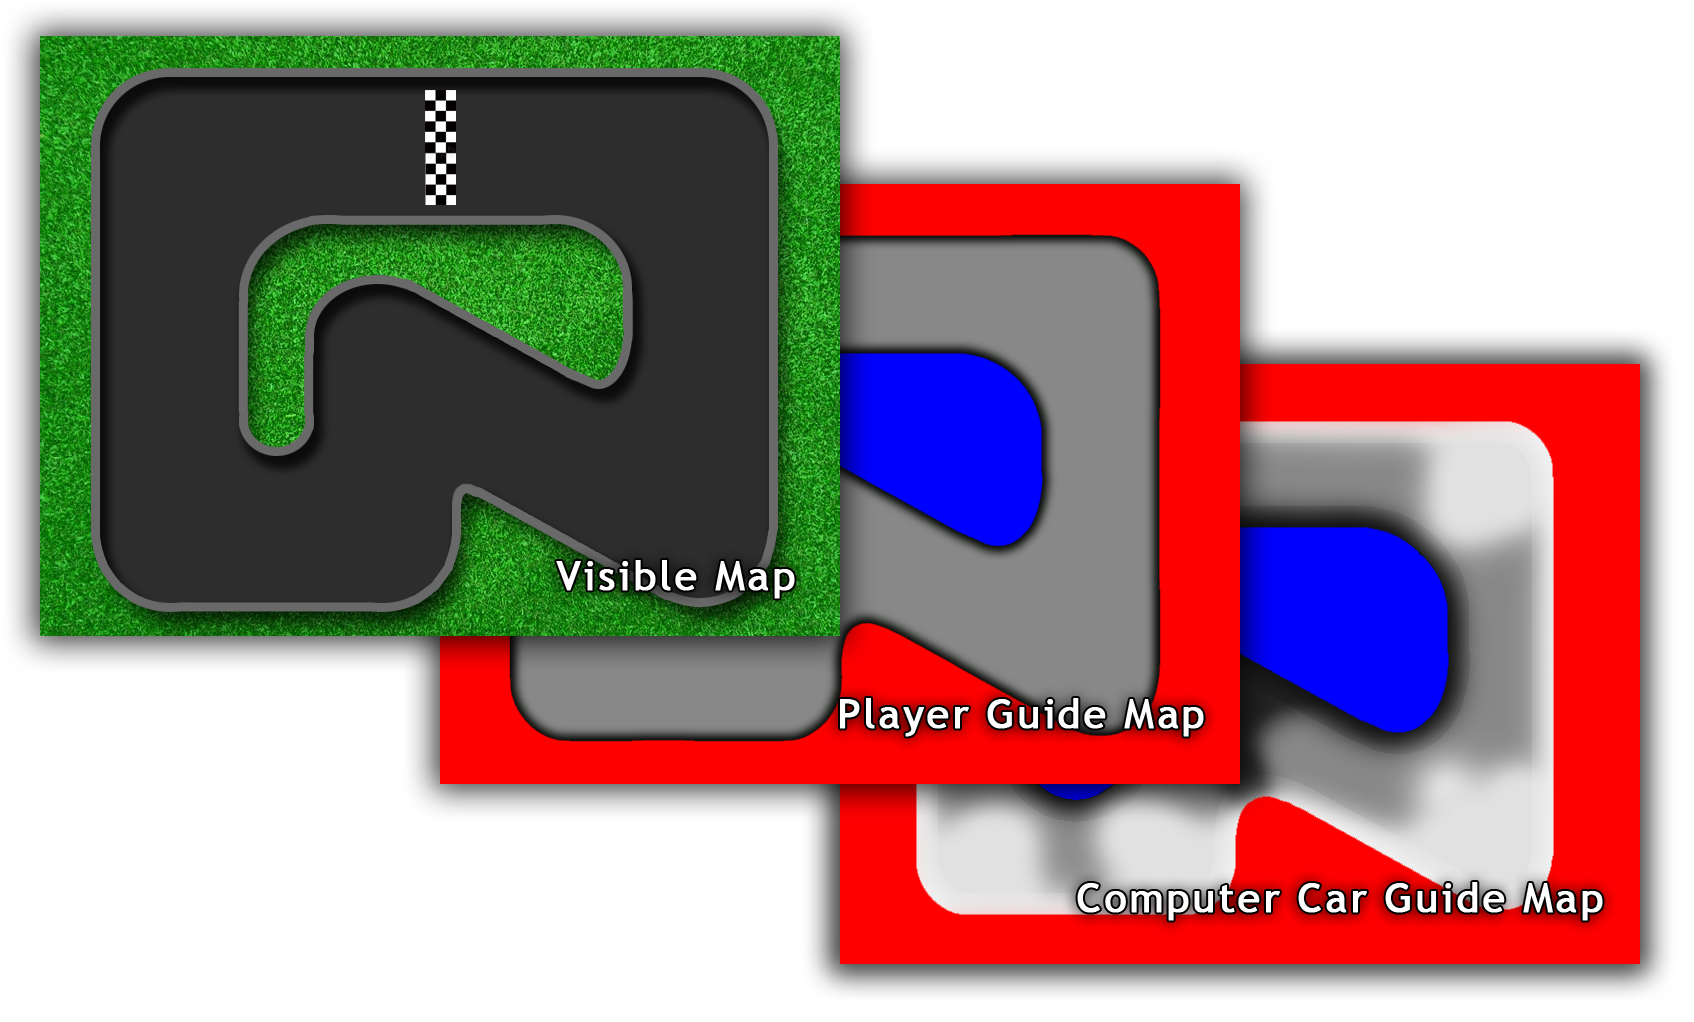
So how can we make our own Super Sprint-style racing game with Pygame Zero? To keep this example code short and simple, I’ve created a simple track with a few bends. In the original game, the movement of the computer-controlled cars would have followed a set of coordinates round the track, but as computers have much more memory now, I have used a bitmap guide for the cars to follow. This method produces a much less predictable movement for the cars as they turn right and left based on the shade of the track on the guide.

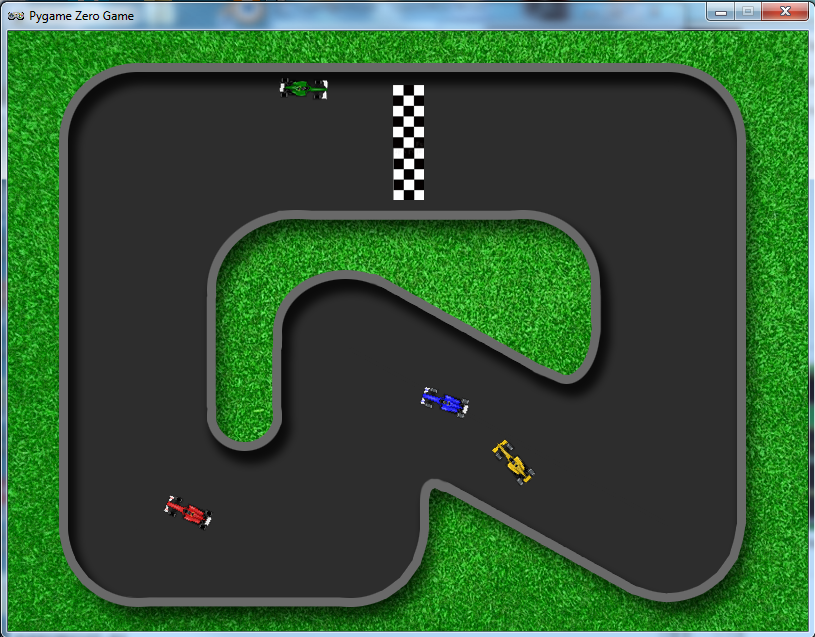
Four Formula One cars race around the track. Collisions between other cars and the sides of the track are detected.
With Pygame Zero, we can write quite a short piece of code to deal with both the player car and the automated ones, but to read pixels from a position on a bitmap, we need to borrow a couple of objects directly from Pygame: we import the Pygame image and Color objects and then load our guide bitmaps. One is for the player to restrict movement to the track, and the other is for guiding the computer-controlled cars around the track.

Three bitmaps are used for the track. One’s visible, and the other two are guides for the cars.
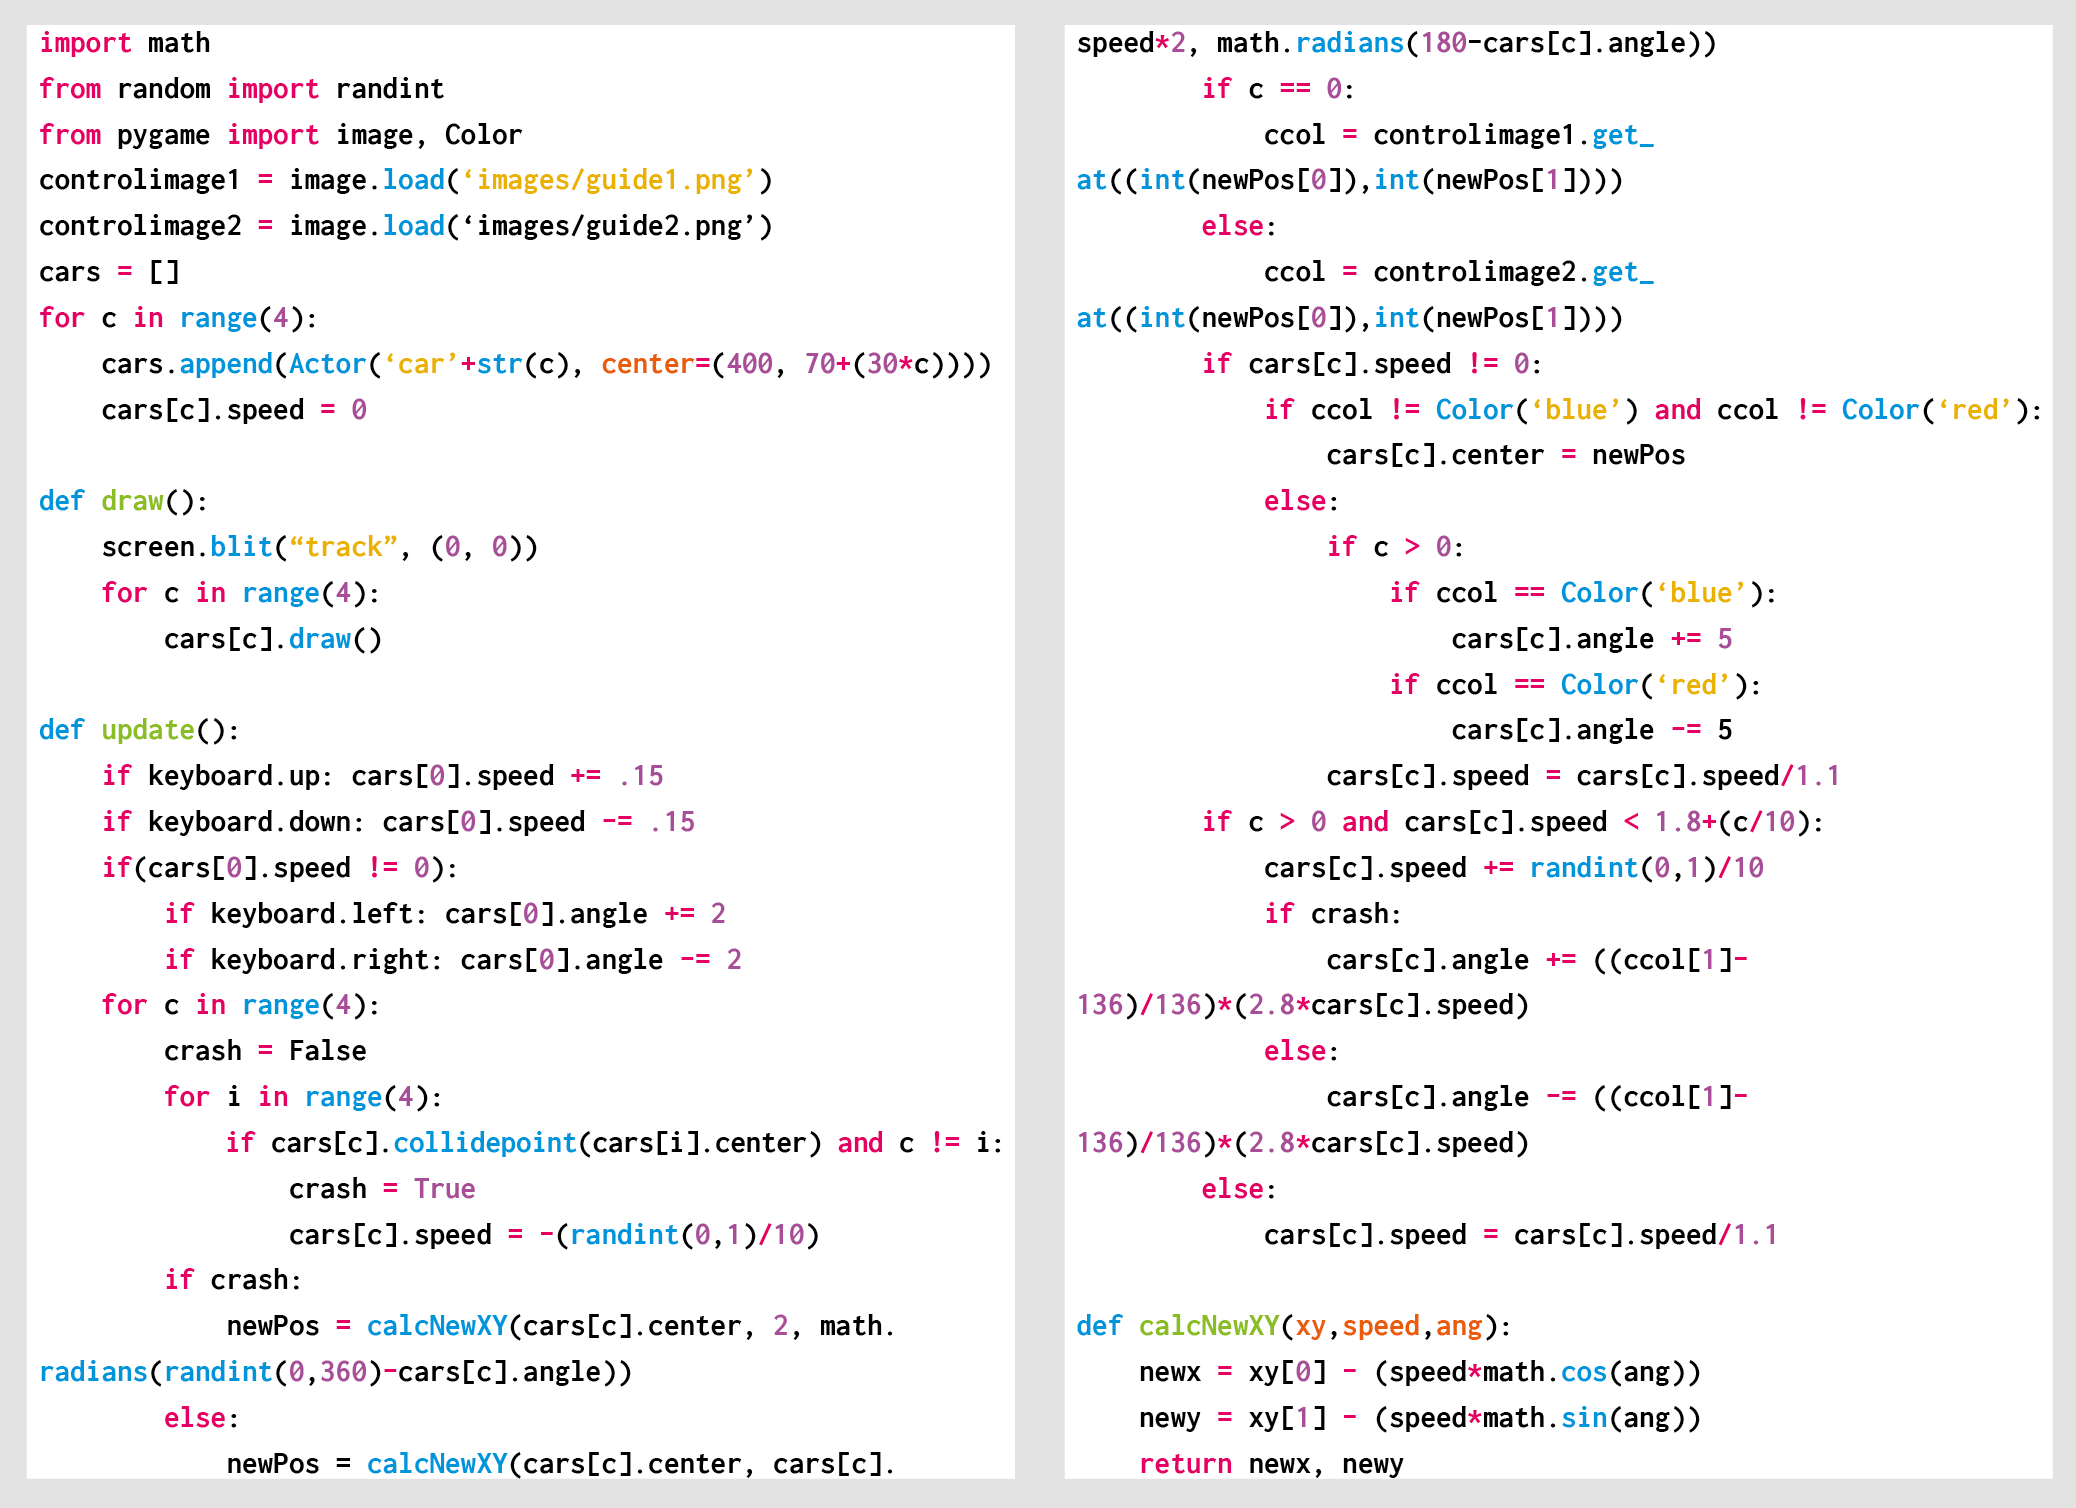
The cars are Pygame Zero Actors, and are drawn after the main track image in the draw() function. Then all the good stuff happens in the update() function. The player’s car is controlled with the up and down arrows for speed, and the left and right arrows to change the direction of movement. We then check to see if any cars have collided with each other. If a crash has happened, we change the direction of the car and make it reverse a bit. We then test the colour of the pixel where the car is trying to move to. If the colour is black or red (the boundaries), the car turns away from the boundary.
The car steering is based on the shade of a pixel’s colour read from the guide bitmap. If it’s light, the car will turn right, if it’s dark, the car will turn left, and if it’s mid-grey, the car continues straight ahead. We could make the cars stick more closely to the centre by making them react quickly, or make them more random by adjusting the steering angle more slowly. A happy medium would be to get the cars mostly sticking to the track but being random enough to make them tricky to overtake.
Our code will need a lot of extra elements to mimic Atari’s original game, but this short snippet shows how easily you can get a top-down racing game working in Pygame Zero:

Here’s Mark’s code, which gets a Super Sprint-style racer running in Python. To get it working on your system, you’ll first need to install Pygame Zero. And to download the full code, go here.
Get your copy of Wireframe issue 21
You can read more features like this one in Wireframe issue 21, available now at Tesco, WHSmith, and all good independent UK newsagents.
Or you can buy Wireframe directly from Raspberry Pi Press — delivery is available worldwide. And if you’d like a handy digital version of the magazine, you can also download issue 21 for free in PDF format.

Make sure to follow Wireframe on Twitter and Facebook for updates and exclusive offers and giveaways. Subscribe on the Wireframe website to save up to 49% compared to news stand pricing!
Website: LINK
