They add strategy to a genre-defining shooter. Andrew Gillett lifts the lid on Space Invaders’ disintegrating shields.

Released in 1978, Space Invaders introduced ideas so fundamental to video games that it’s hard to imagine a time before them. And it did this using custom-made hardware which by today’s standards is unimaginably slow.
Space Invaders ran on an Intel 8080 CPU operating at 2MHz. With such meagre processing power, merely moving sprites around the screen was a struggle. In modern 2D games, at the start of each frame the entire screen is reset, then all objects are displayed.
For Space Invaders’ hardware, this process would have been too slow. Instead, each time a sprite needs to move, the game first erases the sprite from the screen, then redraws it in the new position. The game also updates only one alien per frame — which leads to the effect of the aliens moving faster when there are fewer of them. These techniques cut down the number of pixels which need to be updated each frame, from nearly 60,000 to around a hundred.
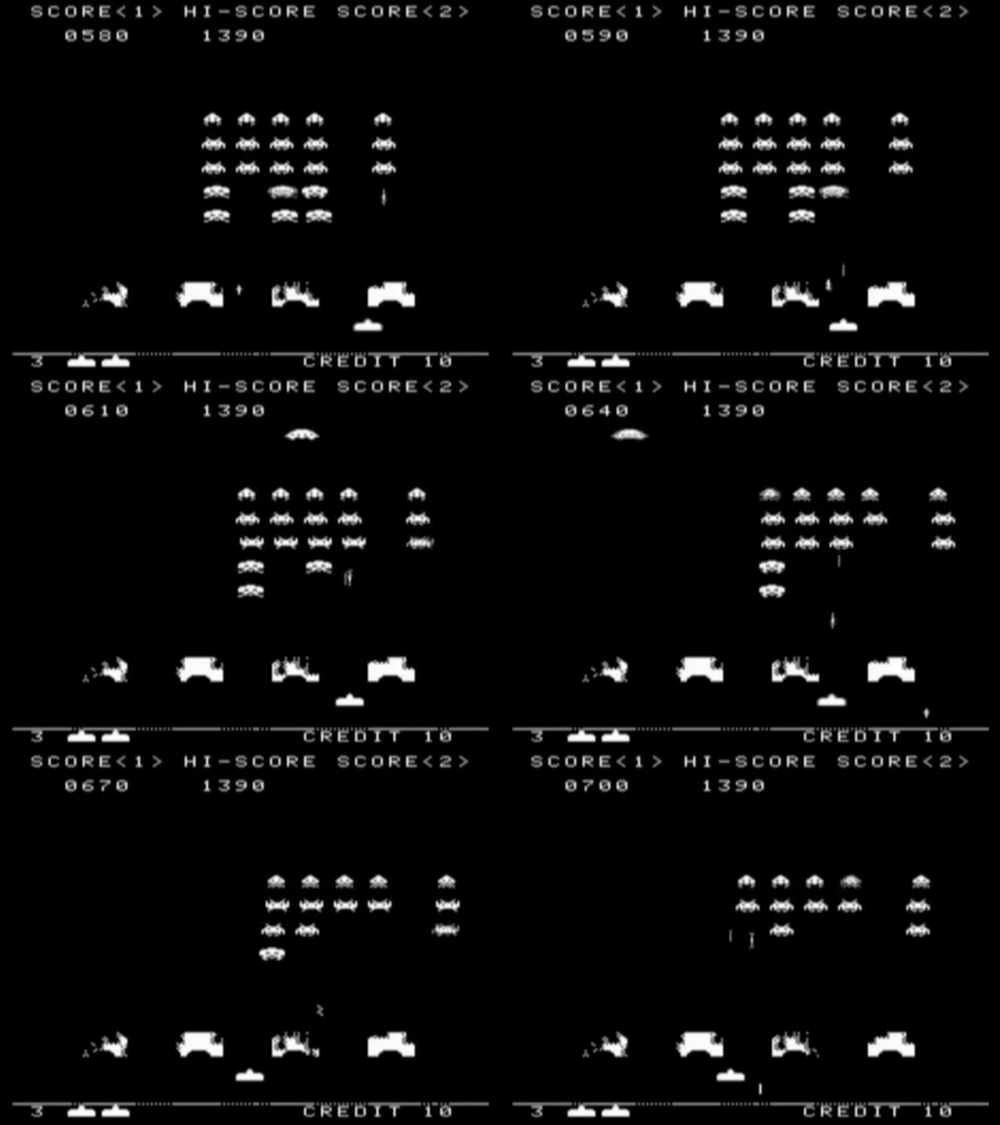
One of Space Invaders’ most notable features is its four shields. These provide shelter from enemy fire, but deteriorate after repeated hits. The player can take advantage of the shields’ destructible nature — by repeatedly firing at the same place on a shield’s underside, a narrow gap can be created which can then be used to take out enemies. (Of course, the player can also be shot through the same gap.)
The system of updating only the minimum necessary number of pixels works well as long as there’s no need for objects to overlap. In the case of the shields, though, what happens when objects do overlap is fundamental to how they work. Whenever a shot hits something, it’s replaced by an explosion sprite. A few frames later, the explosion sprite is deleted from the screen. If the explosion sprite overlapped with a shield, that part of the shield is also deleted.

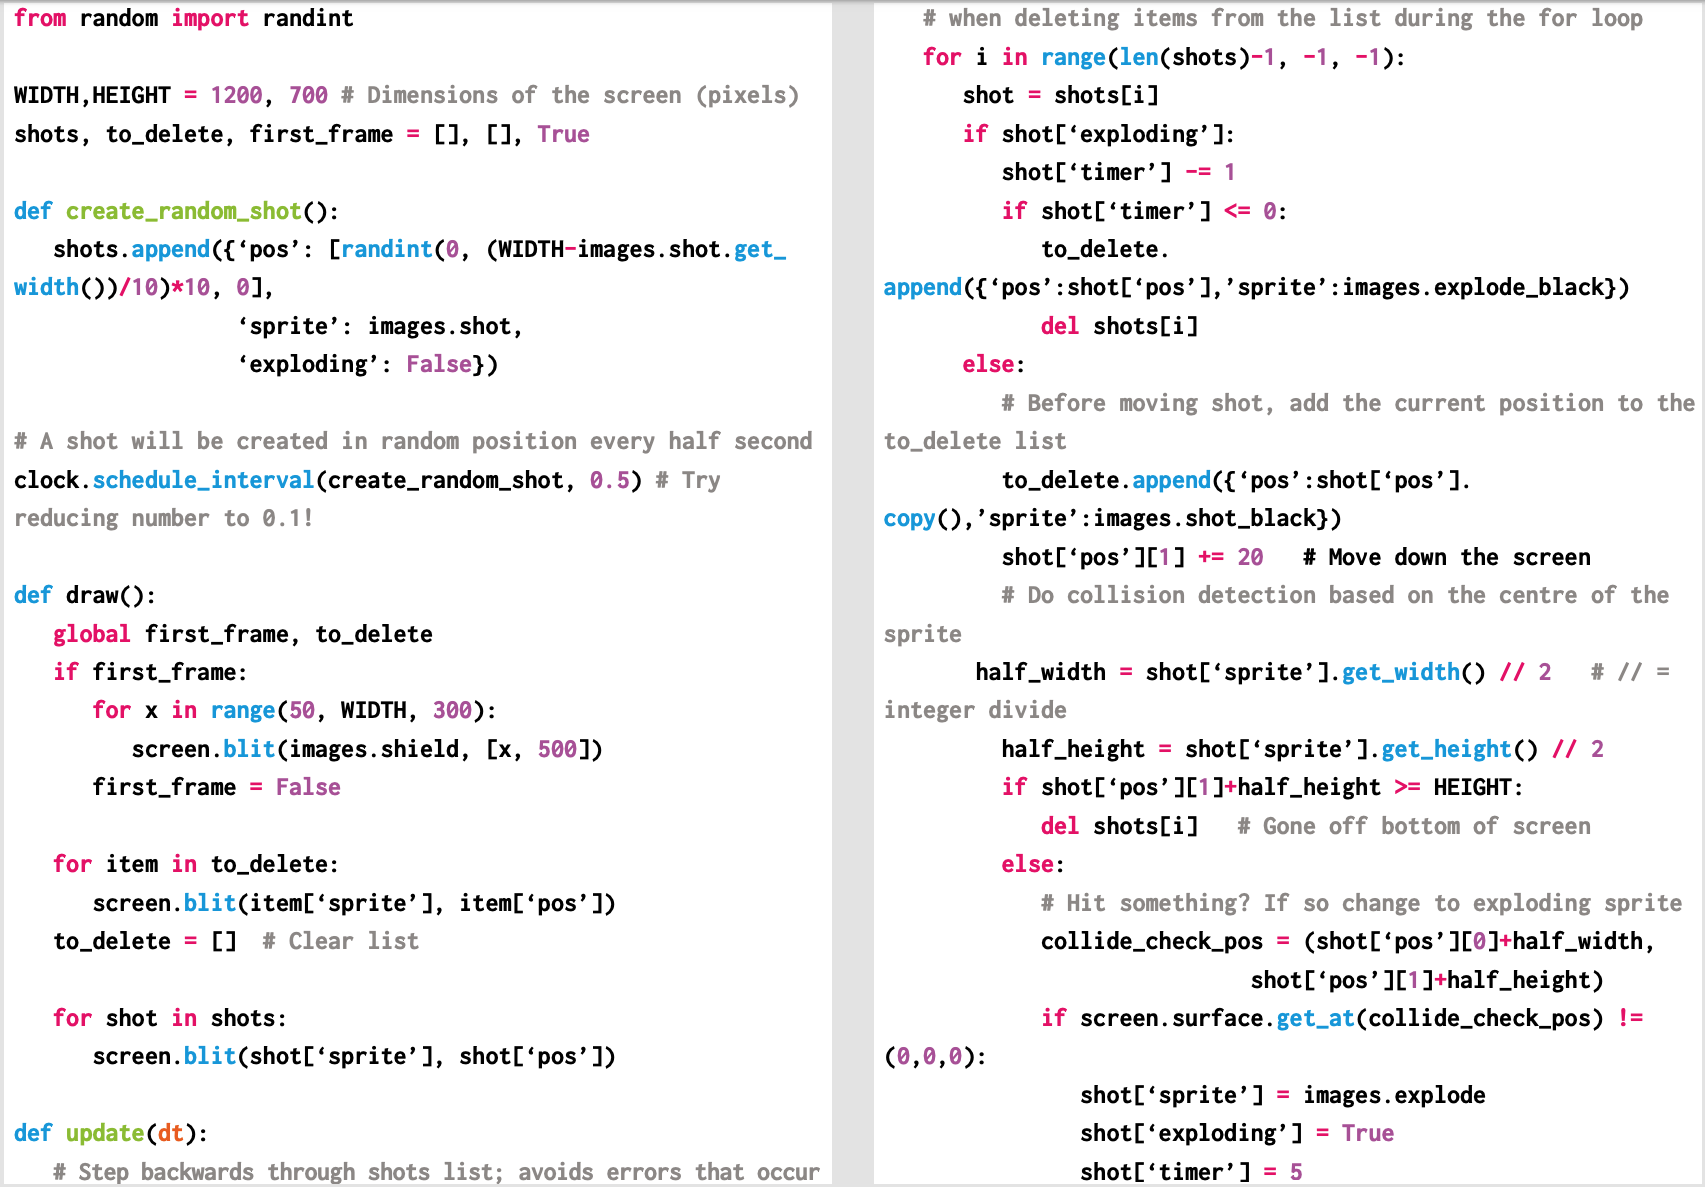
Here’s a code snippet that shows Andrew’s Space Invaders-style disintegrating shields working in Python. To get it running on your system, you’ll need to install Pygame Zero — you can find full instructions here. And download the above code here.
The code to the right displays four shields, and then bombards them with a series of shots which explode on impact. I’m using sprites which have been scaled up by ten, to make it easier to see what’s going on.
We first create two empty lists — one to hold details of any shots on screen, as well as explosions. These will be displayed on the screen every frame. Each entry in the shots list will be a dictionary data structure containing three values: a position, the sprite to be displayed, and whether the shot is in ‘exploding’ mode — in which case it’s displayed in the same position for a few frames before being deleted.
The second list, to_delete, is for sprites which need to be deleted from the screen. For simplicity, I’m using separate copies of the shot and explosion sprites where the white pixels have been changed to black (the other pixels in these sprites are set as transparent).
The function create_random_shot is called every half-second. The combination of dividing the maximum value by ten, choosing a random whole number between zero and the maximum value, and then multiplying the resulting random number by ten, ensures that the chosen X coordinate is a multiple of ten.
Andrew’s Space Invaders shields up and running in Pygame Zero.
In the draw function, we first check to see if it’s the first frame, as we only want to display the shields on that frame. The screen.blit method is used to display sprites, and Pygame Zero’s images object is used to specify which sprite should be displayed. We then display all sprites in the to_delete list, after which we reset it to being an empty list. Finally we display all sprites in the shots list.
In the update function, we go through all sprites in the shots list, in reverse order. Going through the list backwards avoids problems that can occur when deleting items from a list inside a for loop. For each shot, we first check to see if it’s in ‘exploding’ mode. If so, its timer is reduced each frame — when it hits zero we add the shot to the to_delete list, then delete it from shots.
If the item is a normal shot rather than an explosion, we add its current position to to_delete, then update the shot’s position to move the sprite down the screen. We next check to see if the sprite has either gone off the bottom of the screen or collided with something. Pygame’s get_at method gives us the colour of a pixel at a given position. If a collision occurs, we switch the shot into ‘exploding’ mode — the explosion sprite will be displayed for five frames.
You can read the rest of the feature in Wireframe issue 9, available now in Tesco, WHSmith, and all good independent UK newsagents.
Or you can buy Wireframe directly from us – worldwide delivery is available. And if you’d like to own a handy digital version of the magazine, you can also download a free PDF.
Make sure to follow Wireframe on Twitter and Facebook for updates and exclusives, and for subscriptions, visit the Wireframe website to save 49% compared to newsstand pricing!
Website: LINK


